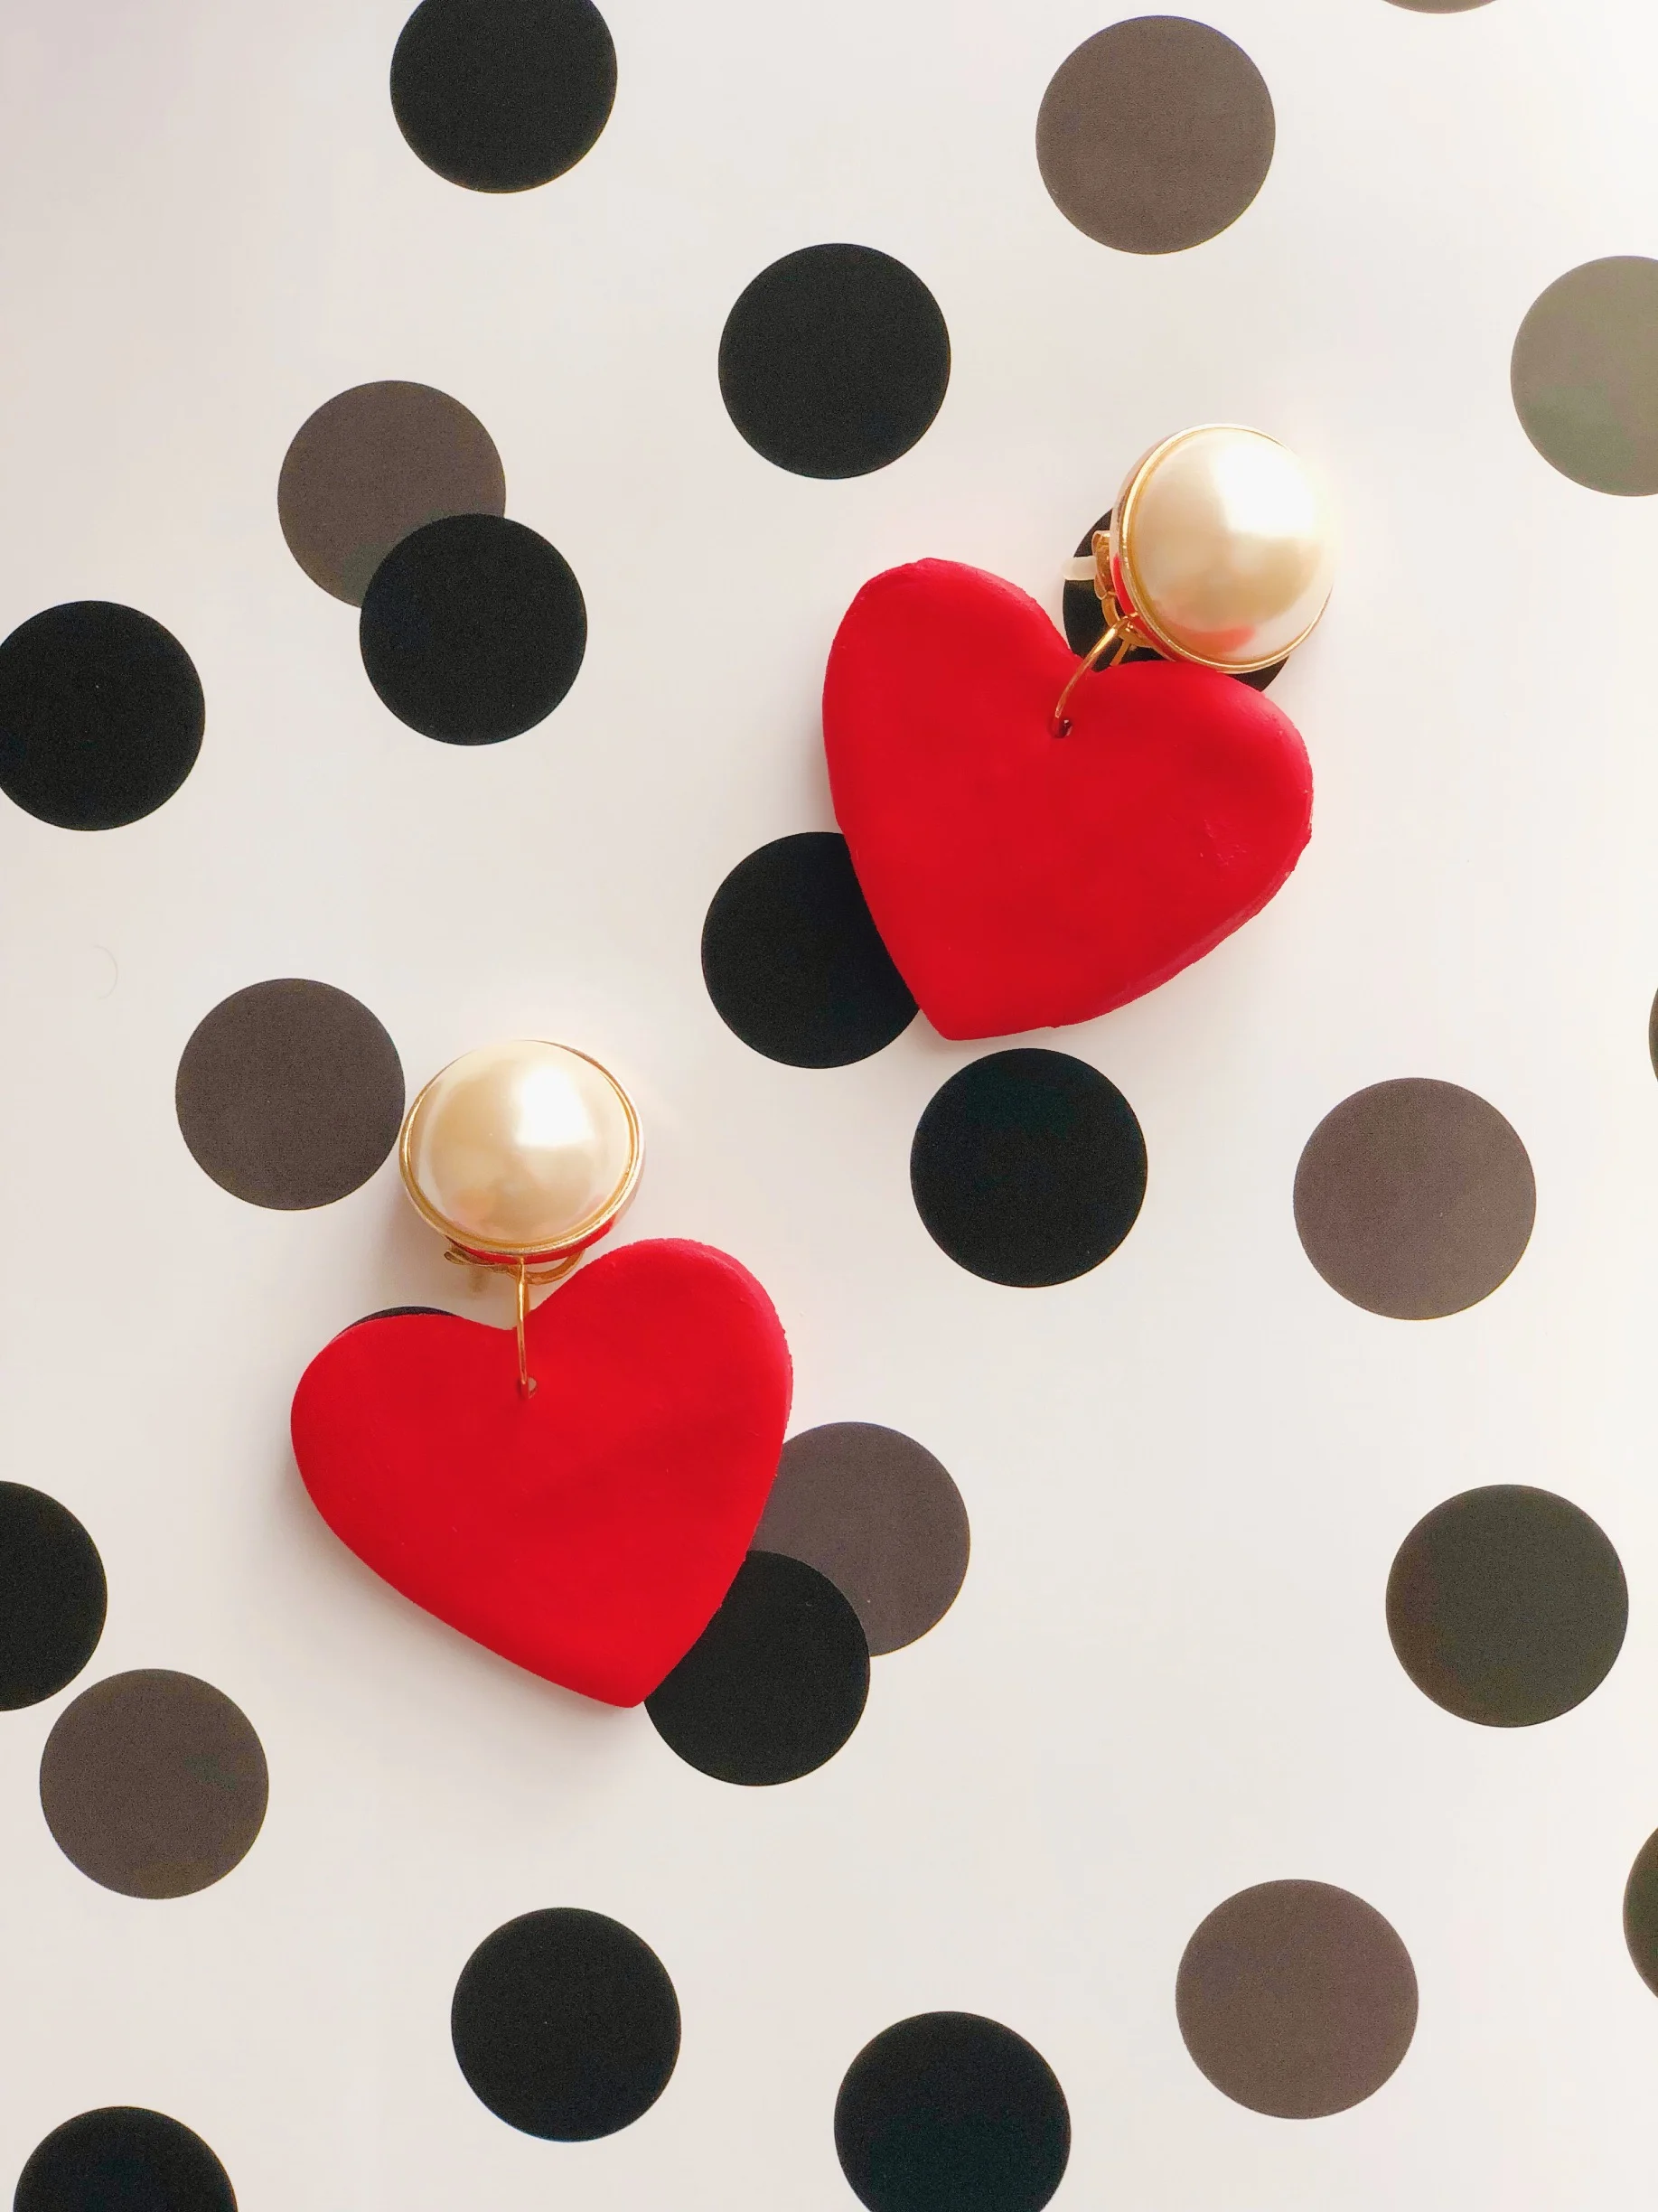
DIY HEART EARRINGS ❤️

So what started out as a simple DIY in my head actually turned out to be a bit of a pain in the you know what! Recently, I’d been eyeing a ton of heart earrings on the marketplace and had the idea to make a simple pair of my own.
I thought it would be fun (yeah right) to achieve that marble effect similar to a Bauble Bar pair I spotted and decided clay would do the trick. I planned out the entire DIY in my mind and decided to tackle the project this weekend only run into bumps along the way, hence the Wednesday post instead of Monday.
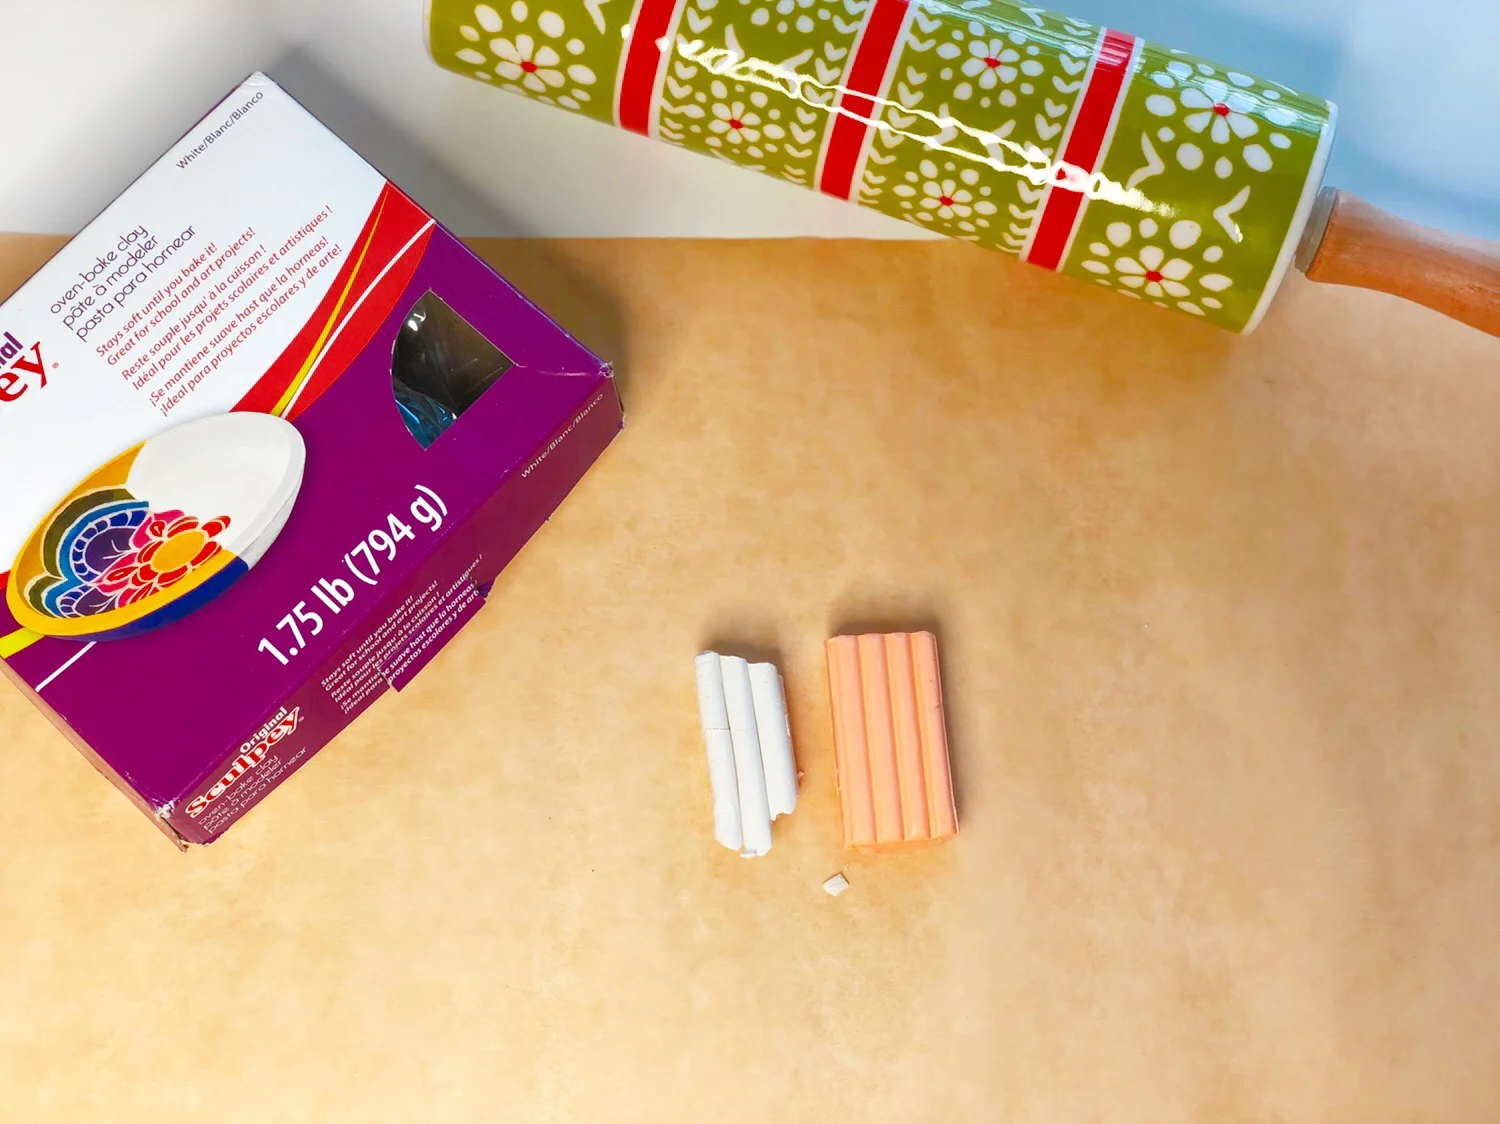
First I thought I could color the white clay I had on hand with a bit of red paint to produce pink. Good idea, right? Wrong! The acrylic paint made the clay chalky and my hands super red. With no time to visit the craft store I scoured my craft supplies drawer for more clay and found a peach block. Hey, it wasn’t pink but it would work. At this point, things were going smoothly again in my mind but then as I began working with the clay I realized it was super hard to shape and proceeded to do another search in my drawers. I came out with a clay softening liquid and finally went about making the earrings. After the clay was done baking I despised the color, so just painted the hearts red and called it a day.
I’m not super elated with how they turned out but oftentimes what I think isn’t the best is actually not so bad and in theory this is very simple to make if you have all the right supplies on hand. Lighting was not on my side for these pictures but with all that said, I decided to still share this tutorial with you.
Now, if DIY isn’t your thing don’t worry about it, I rounded up some cute heart earrings for you at the end of this post. Happy almost Valentine’s day darlings!
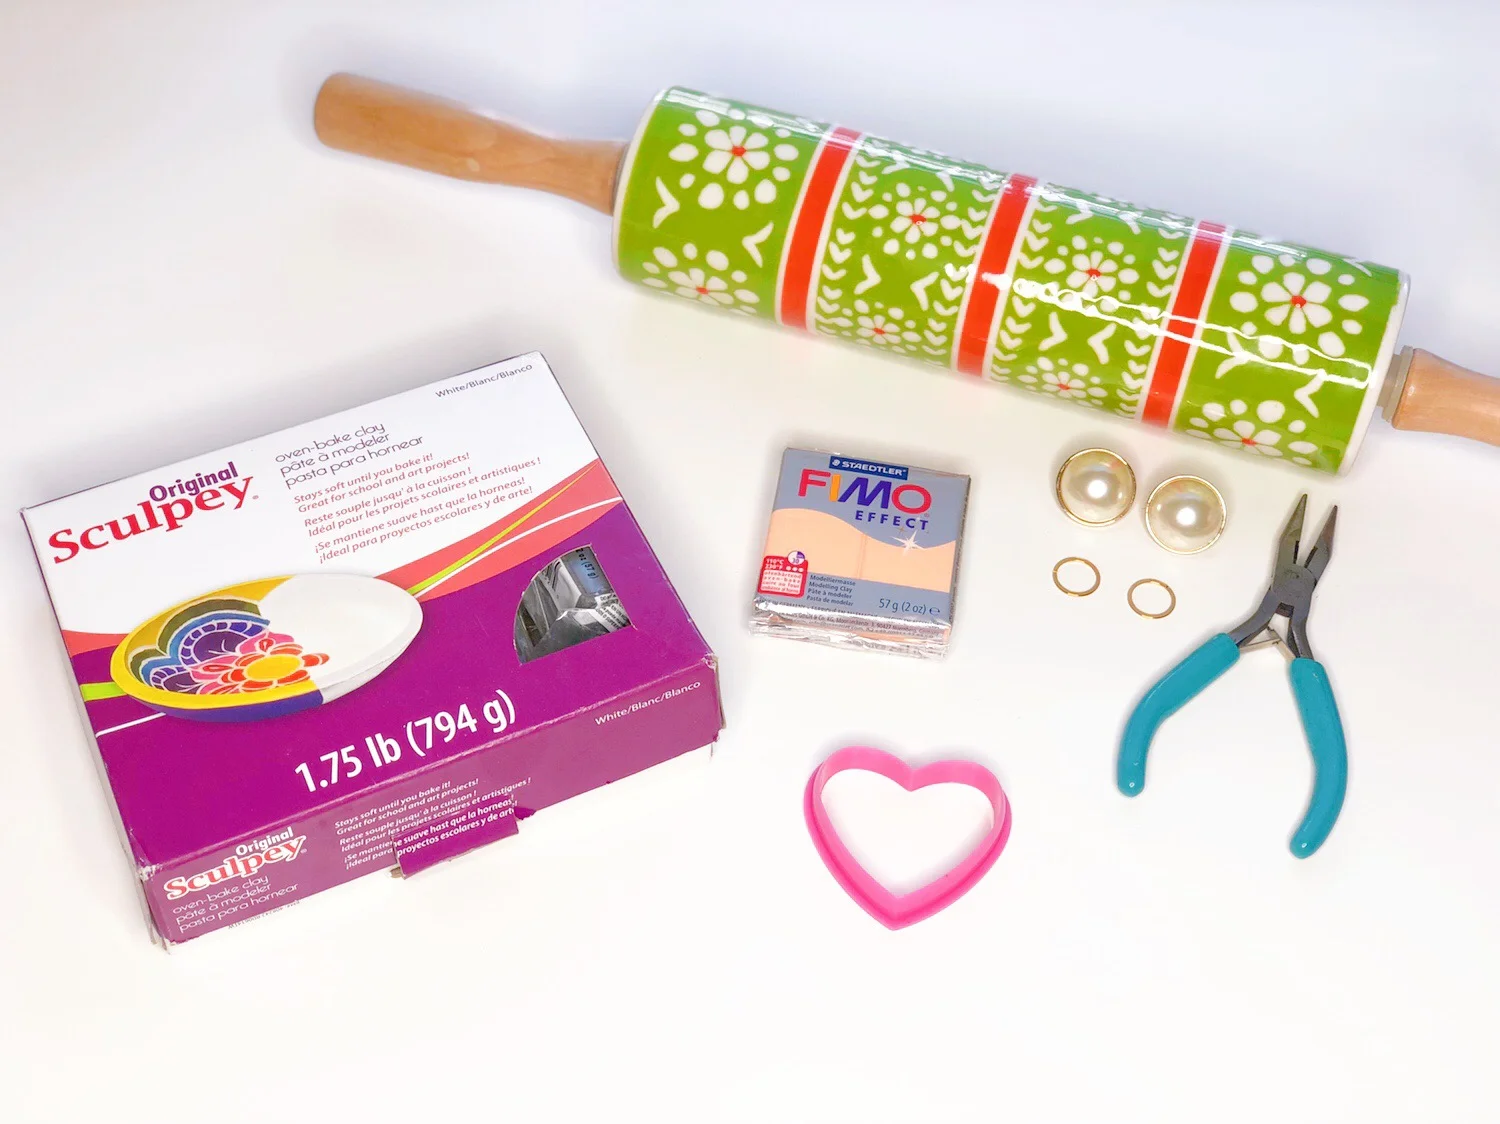
SUPPLIES
Clay
Earring posts (I repurposed mine from some broken earrings I had)
Heart cookie cutter
Jump rings
Jewelry pliers
Rolling pin
Toothpick
Parchment paper
Red paint
STEP 1
Begin by softening your clay, then combining the two colors together for a marble effect . Check out my post here for more details on that.
STEP 2
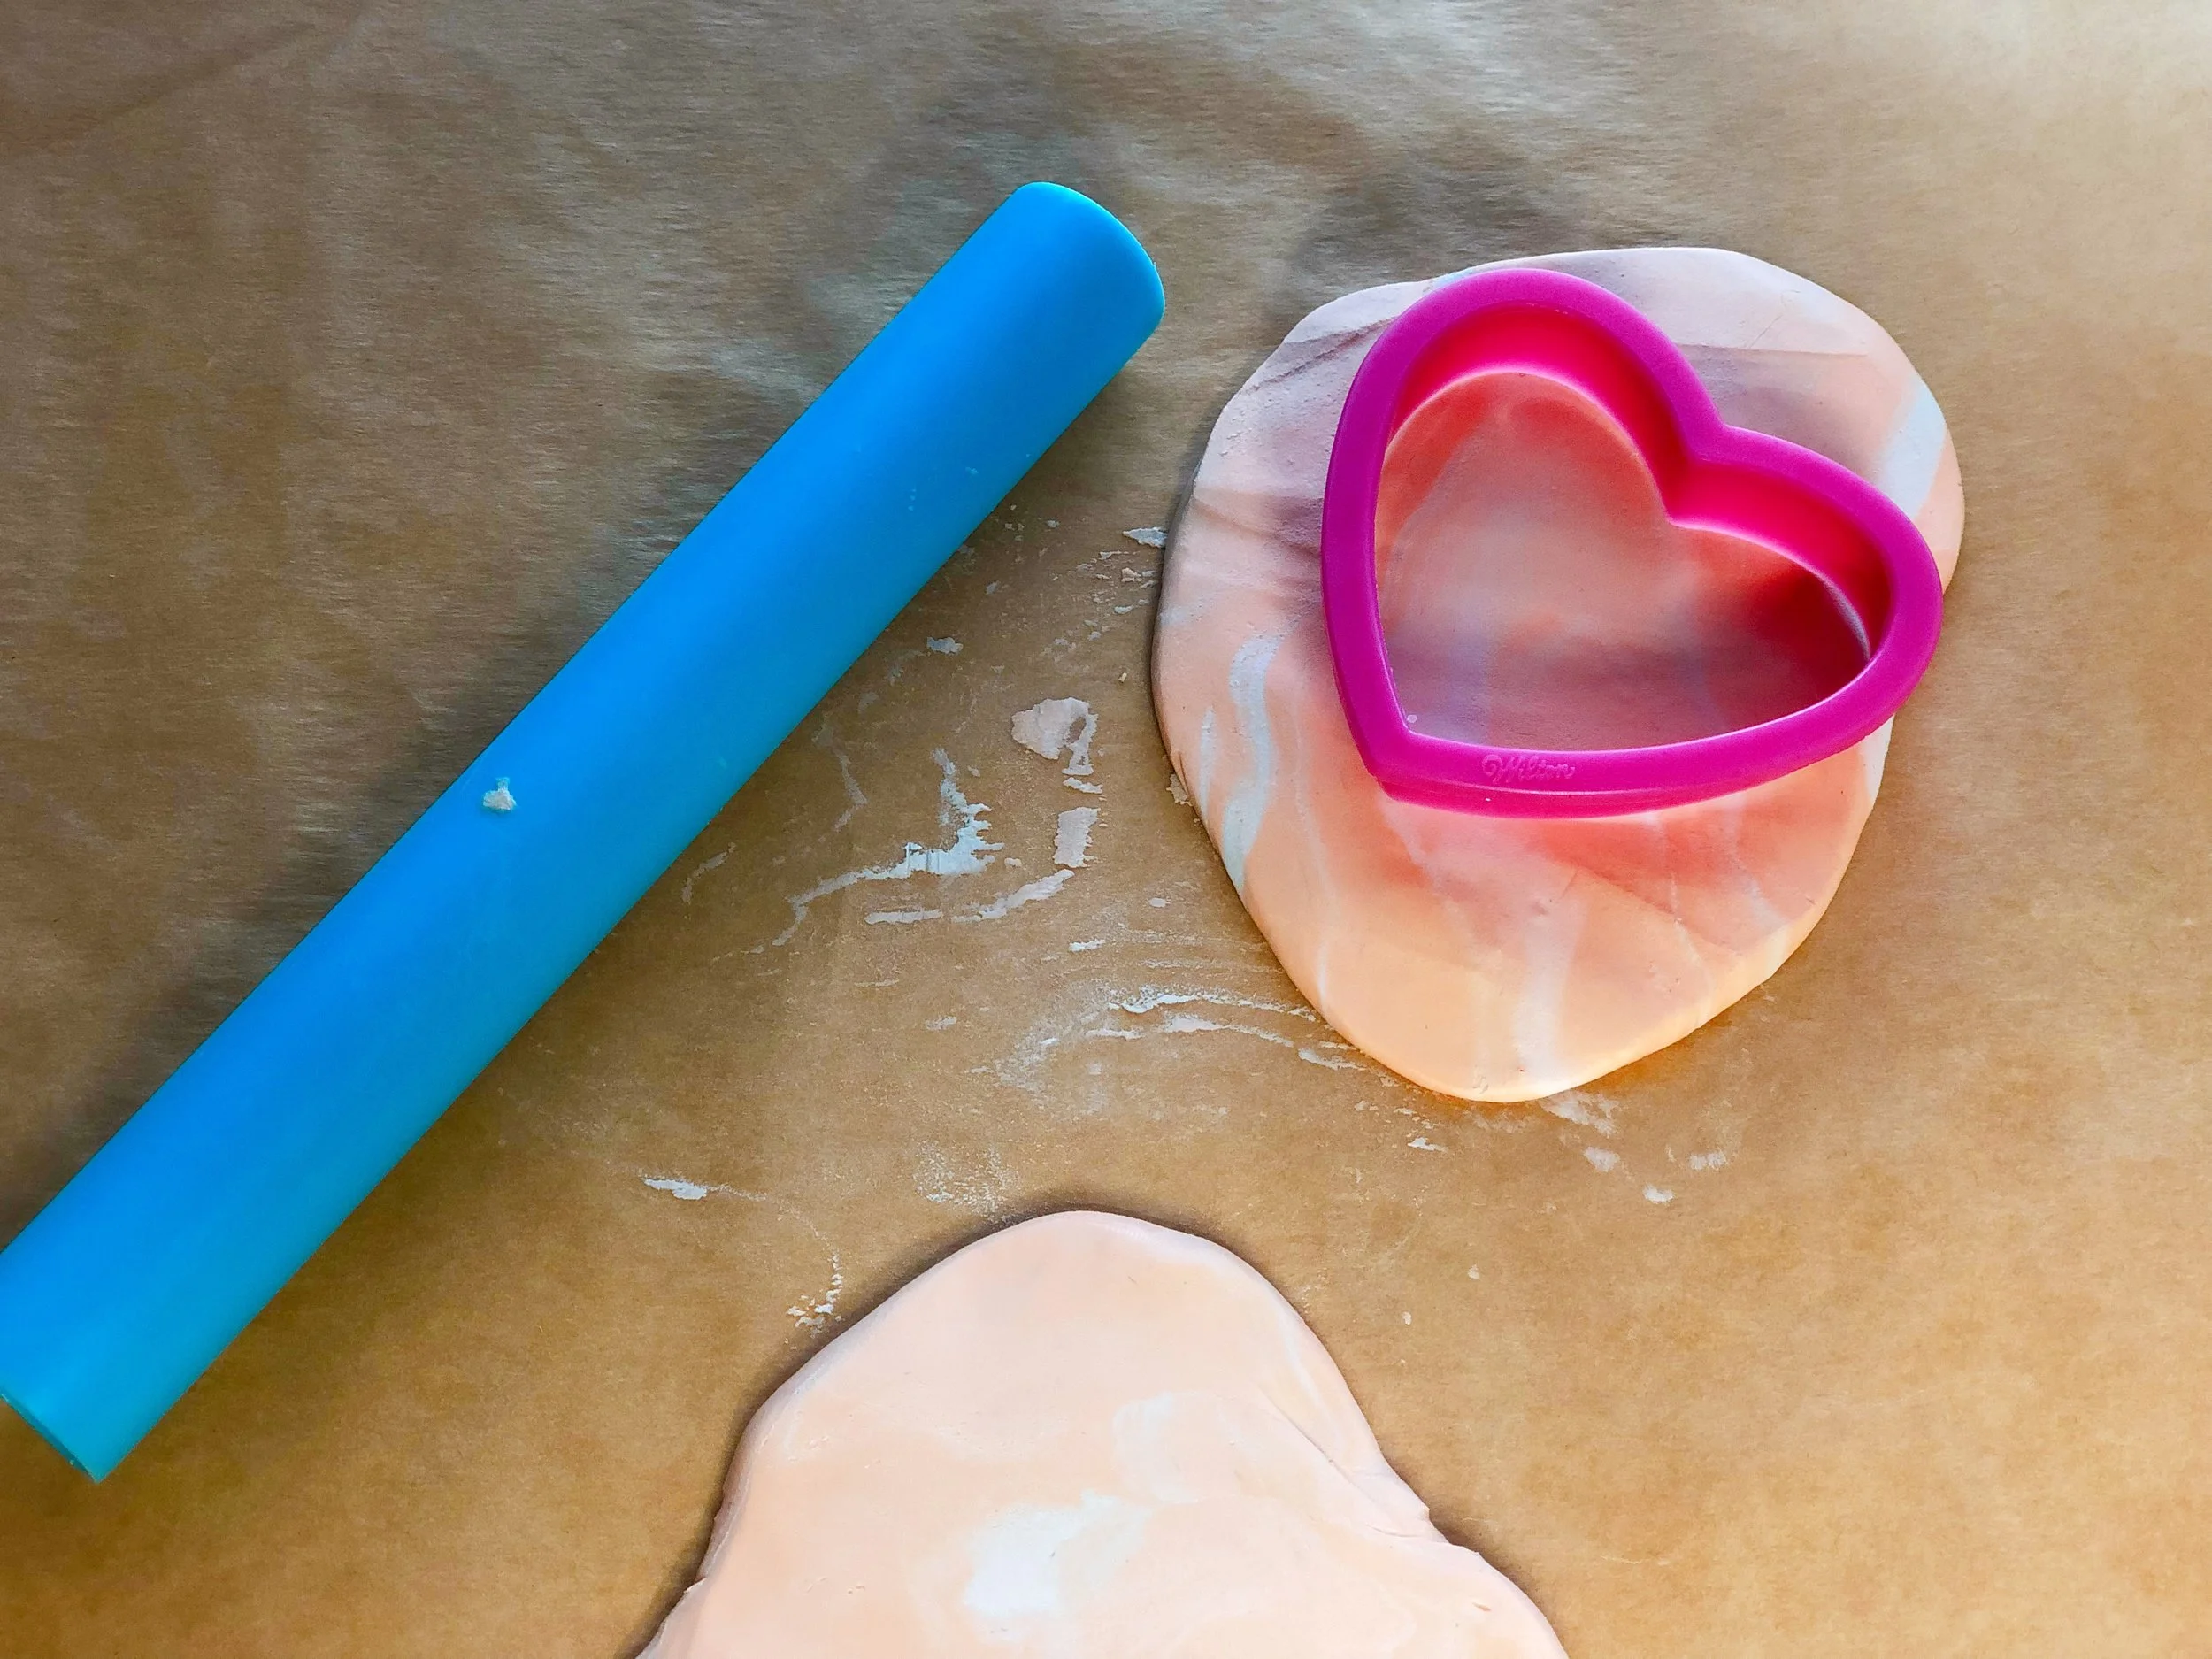
Once your clay is all rolled out, use your heart cookie cutter to cut out the shapes
STEP 3
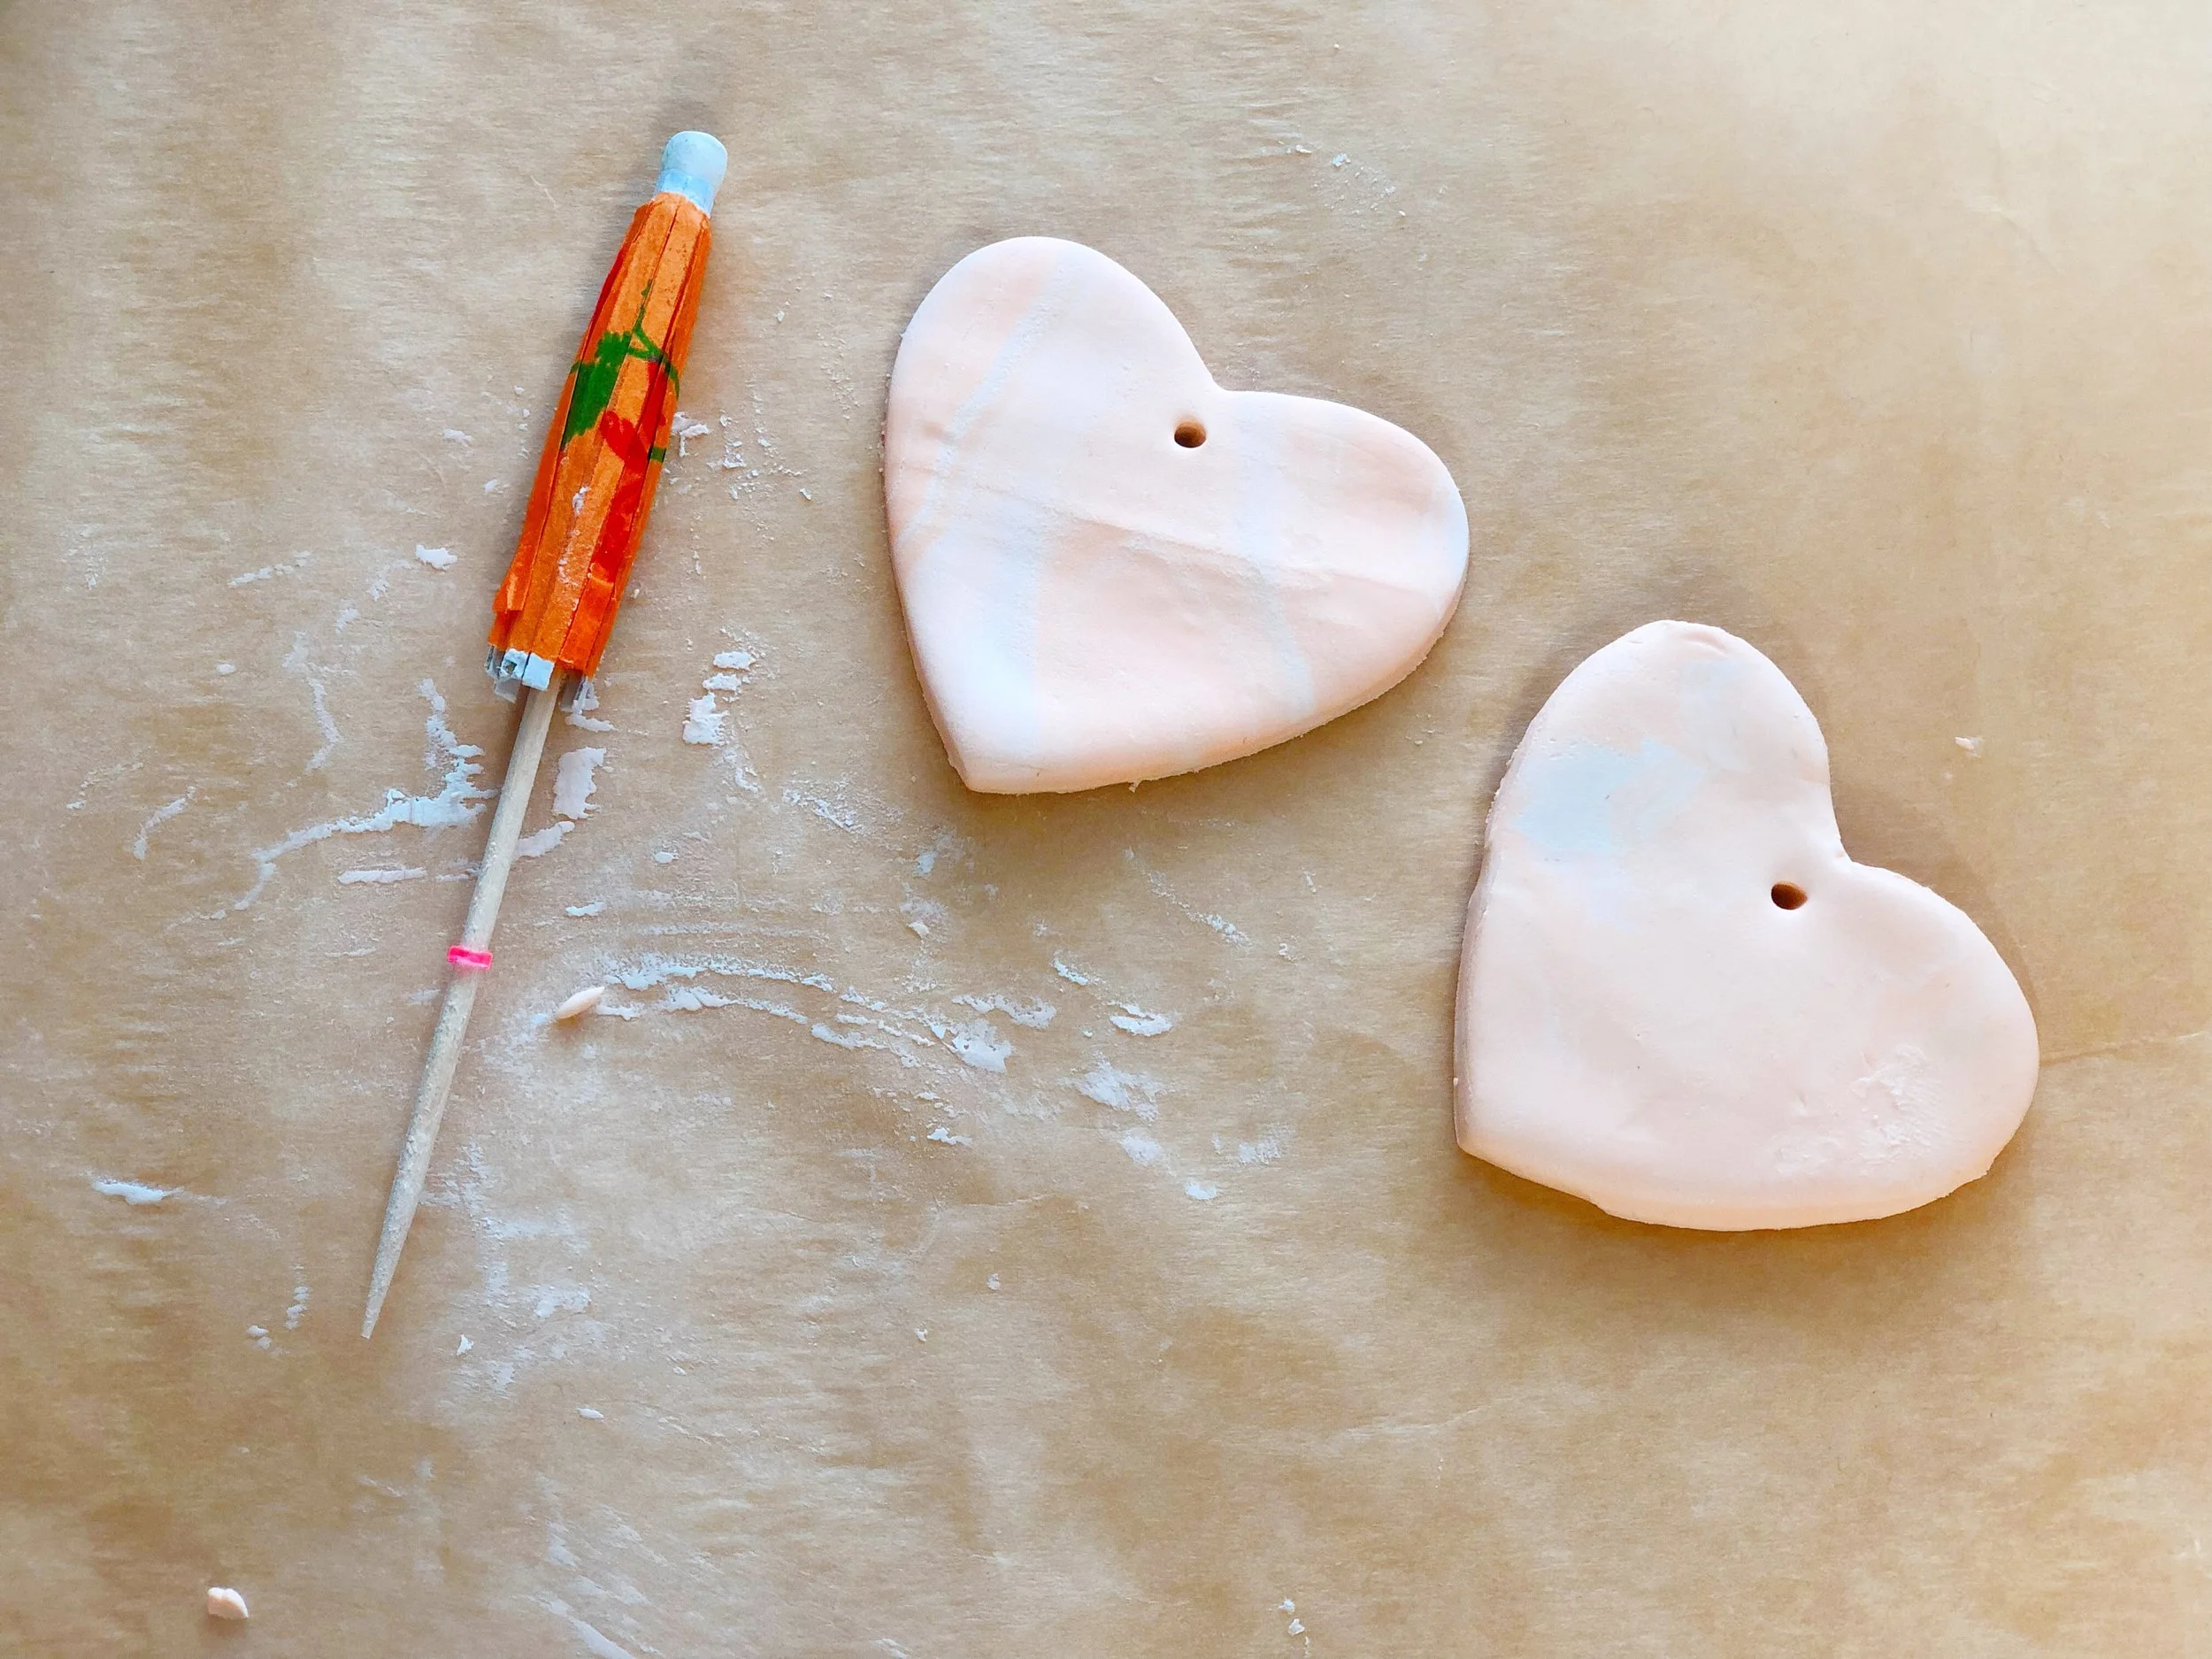
Using a toothpick, pierce a hole in the top center of your heart shape. Place hearts on parchment lined baking sheet and bake per clay’s instructions
STEP 4
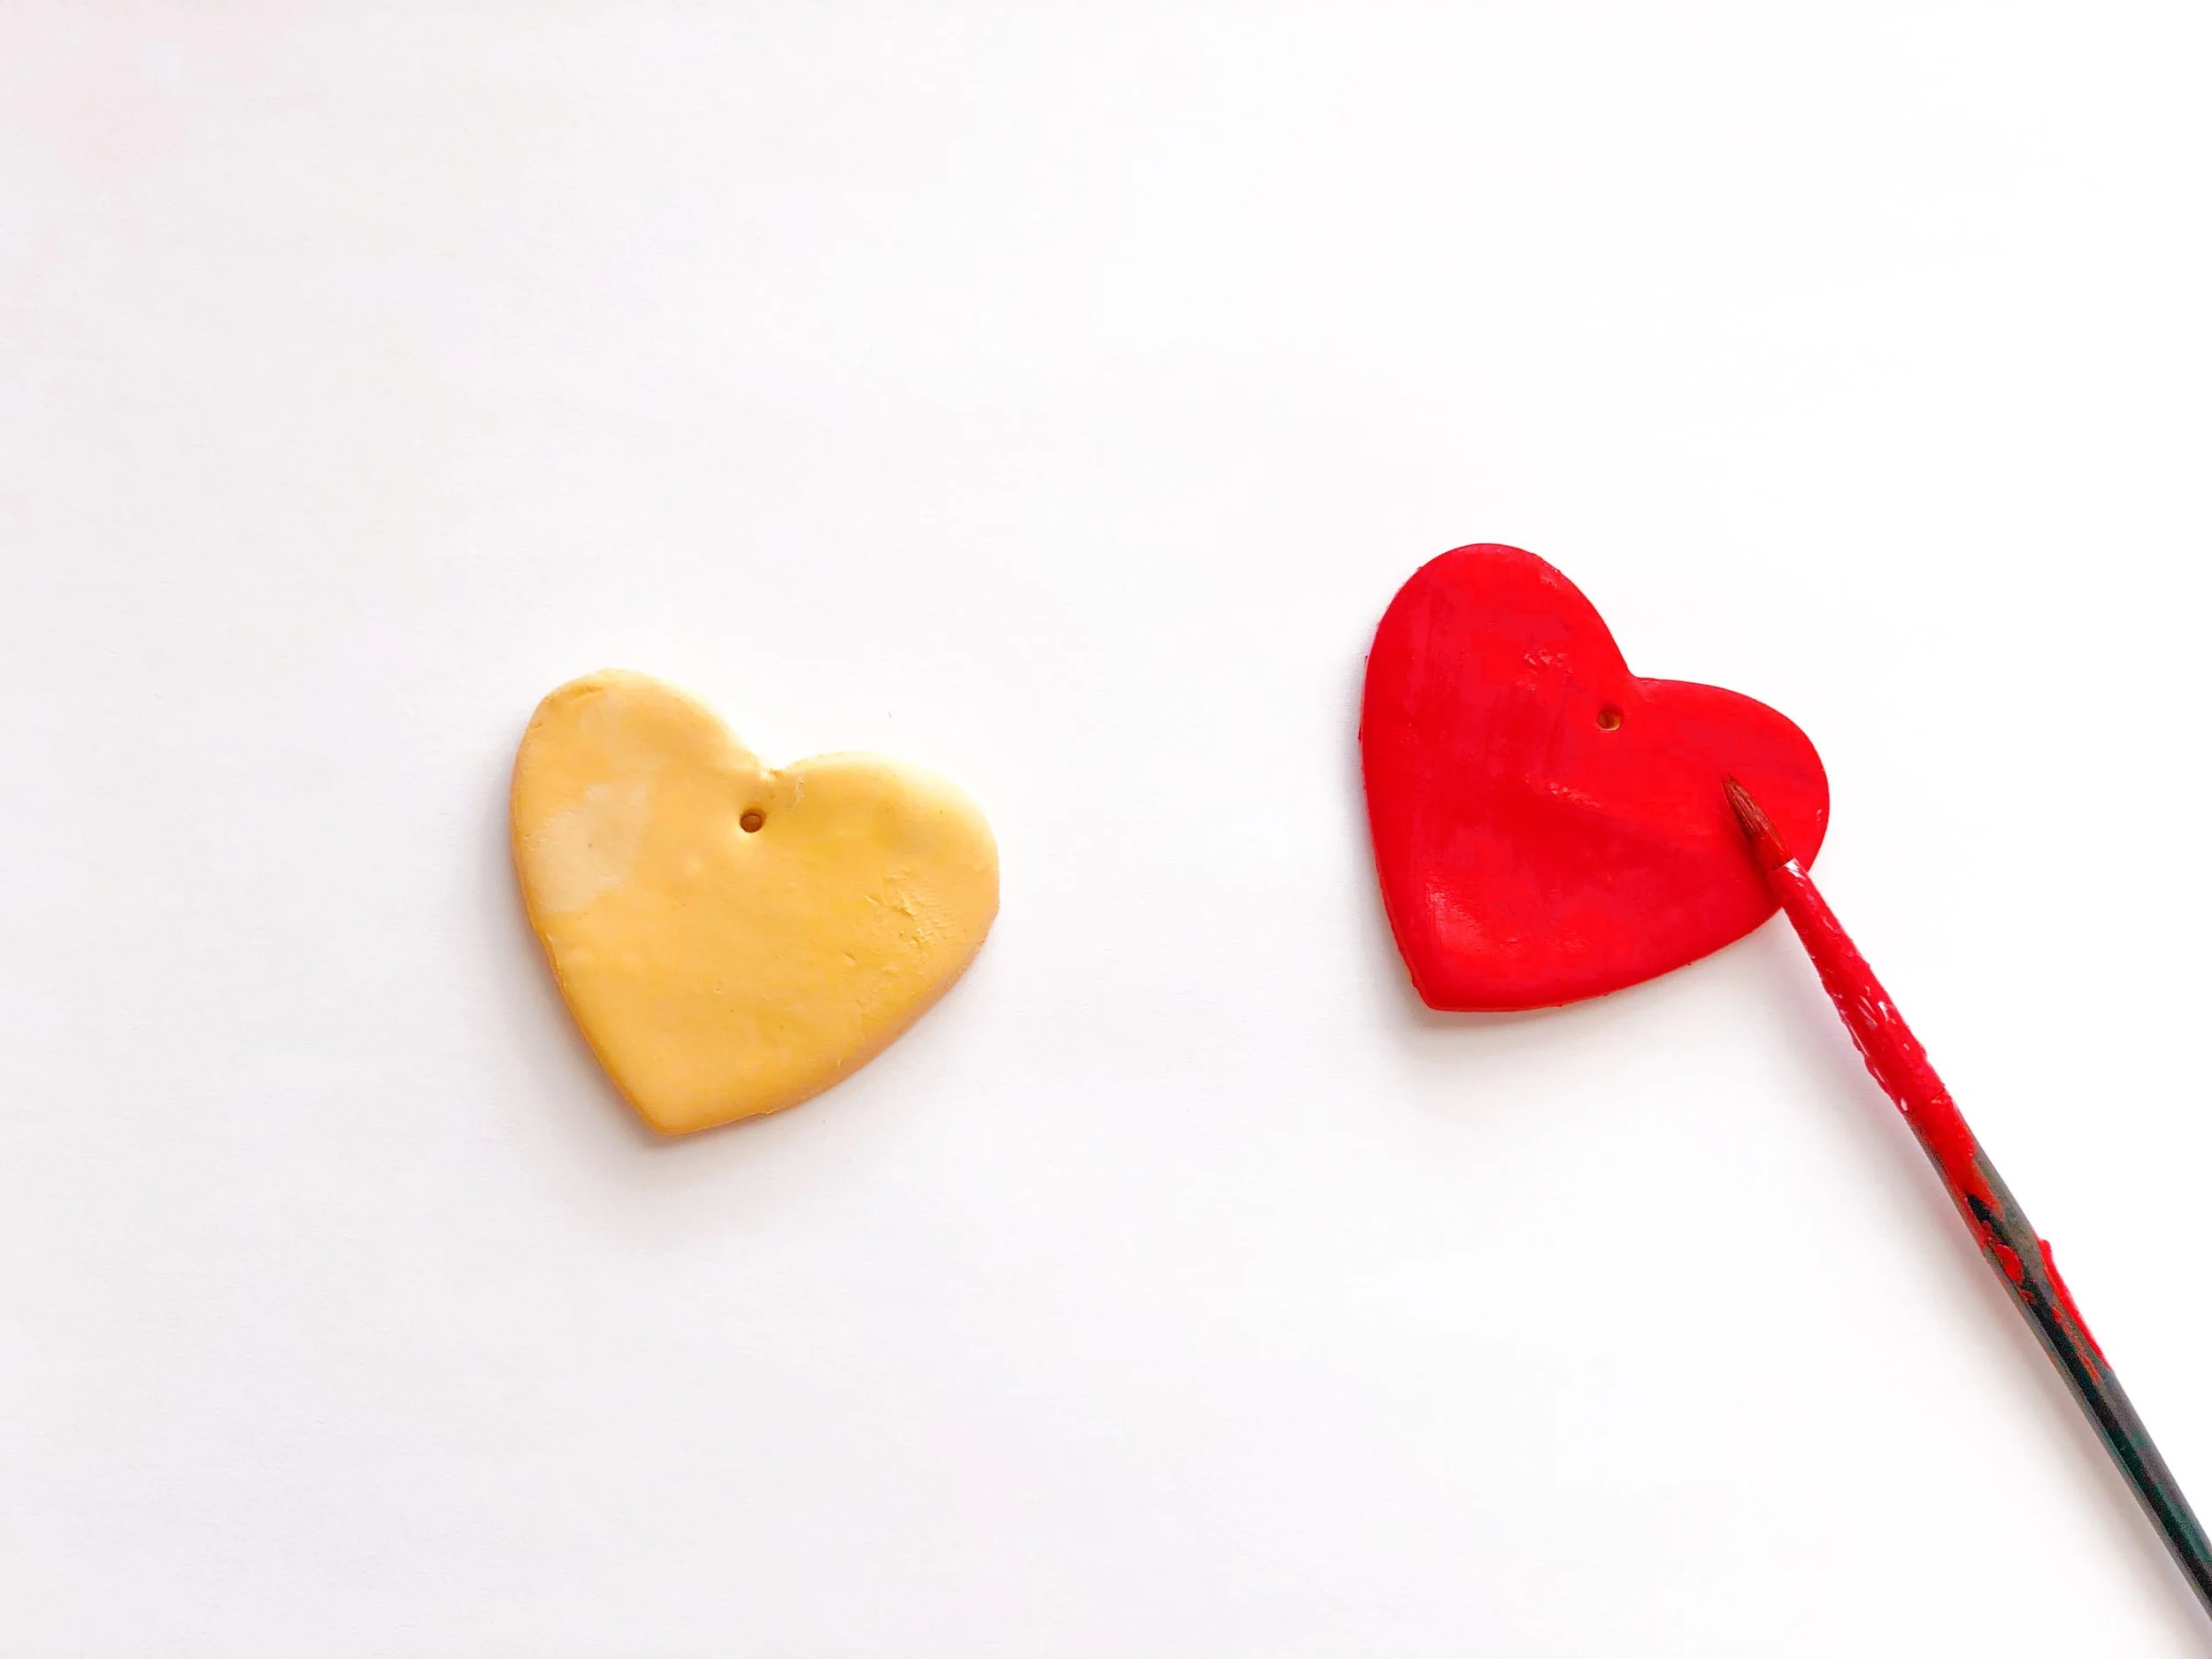
At this point I thought all was well but after the clay was done baking I didn’t like the color and decided to paint the hearts with red acrylic paint.
STEP 5
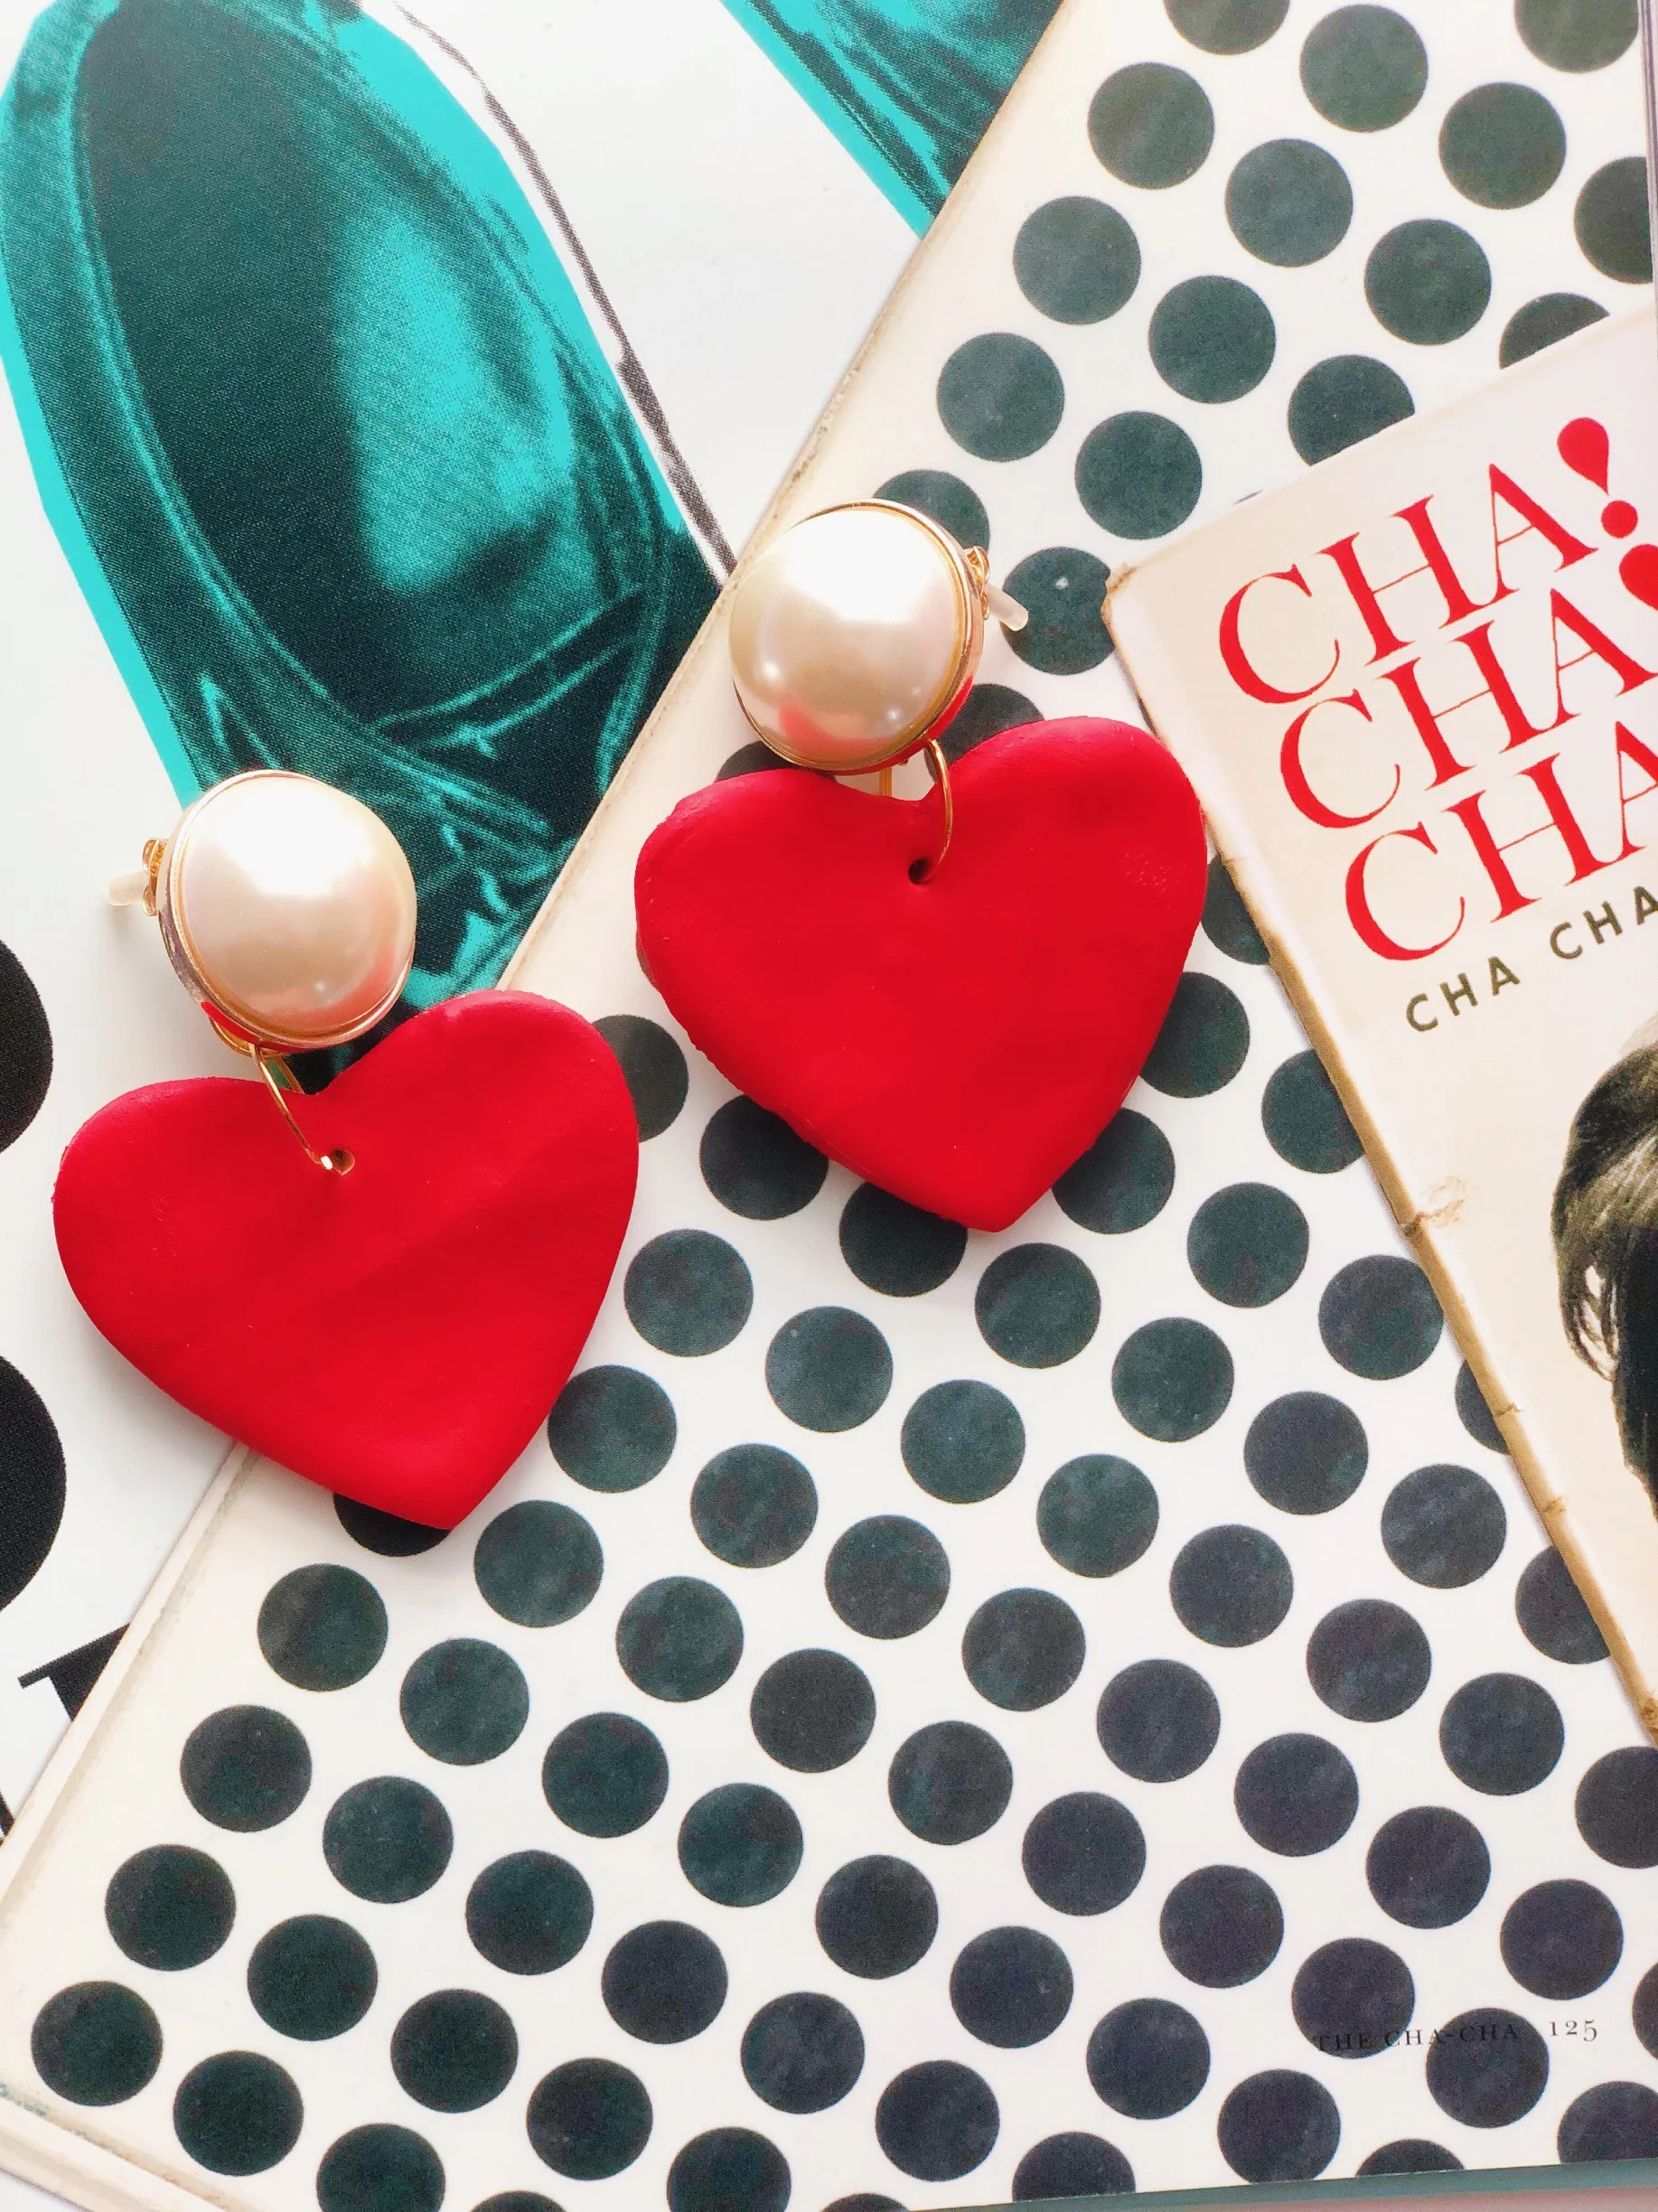
Attach your earring post with jump rings and you’re all done! Seriously, I’m so done with this DIY.