DIY SIMPLE ORCHID HAIR CROWN 🌸👑

Happy Friday darlings! Today I’m finally sharing this DIY orchid crown with you! I actually took a poll on Instagram a few months back with the red one I took on my Panama vacation and 85% of you said you’d like the tutorial. The other 15% of you better not be reading this post 😂, just kidding!

I think this crown is actually perfect for Fall because orchids tend to start blooming during this season. Anywhoo, let’s jump right into the steps and as always, I made the project super easy for you to tackle so I hope you enjoy!
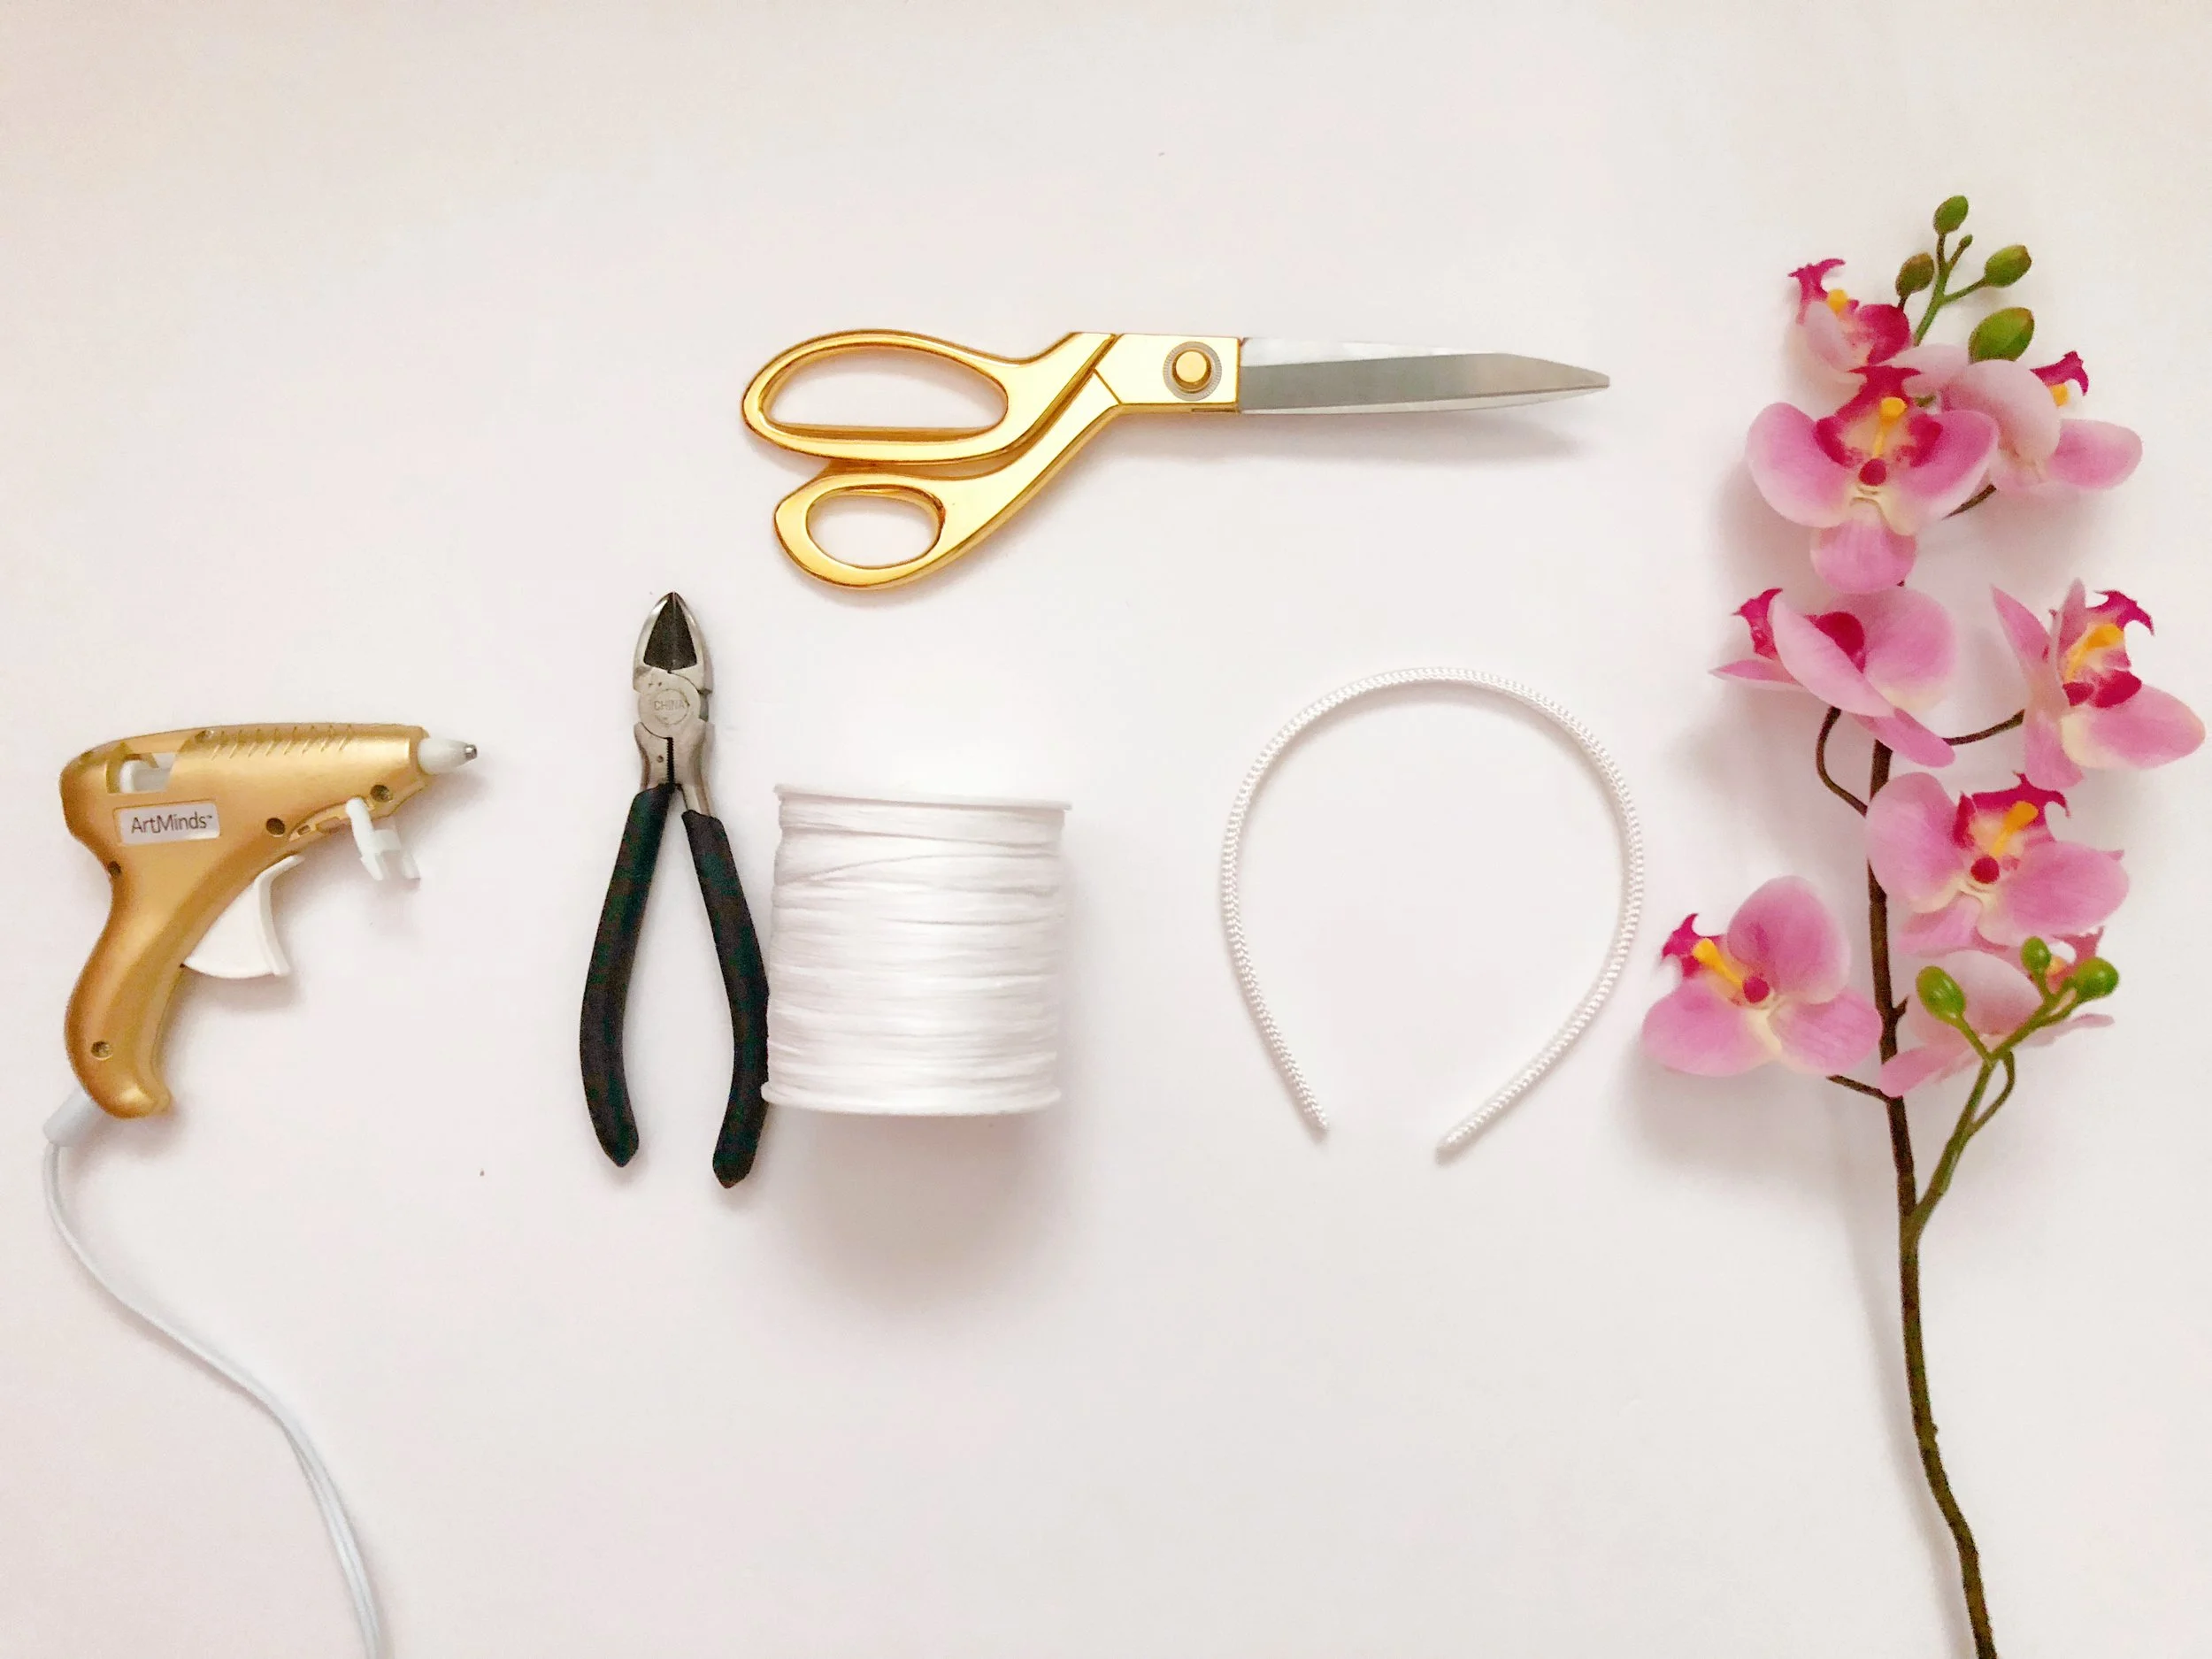
SUPPLIES:
- Glue Gun
- Wire cutter
- Scissors
- Headband
- Raffia (same color as headband if possible)
- Faux orchid stem
ALL SUPPLIES ARE AVAILABLE IN MY AMAZON SHOP HERE
STEP 1

Begin by forming the shape of your orchid stem to match the shape of your headband.
STEP 2

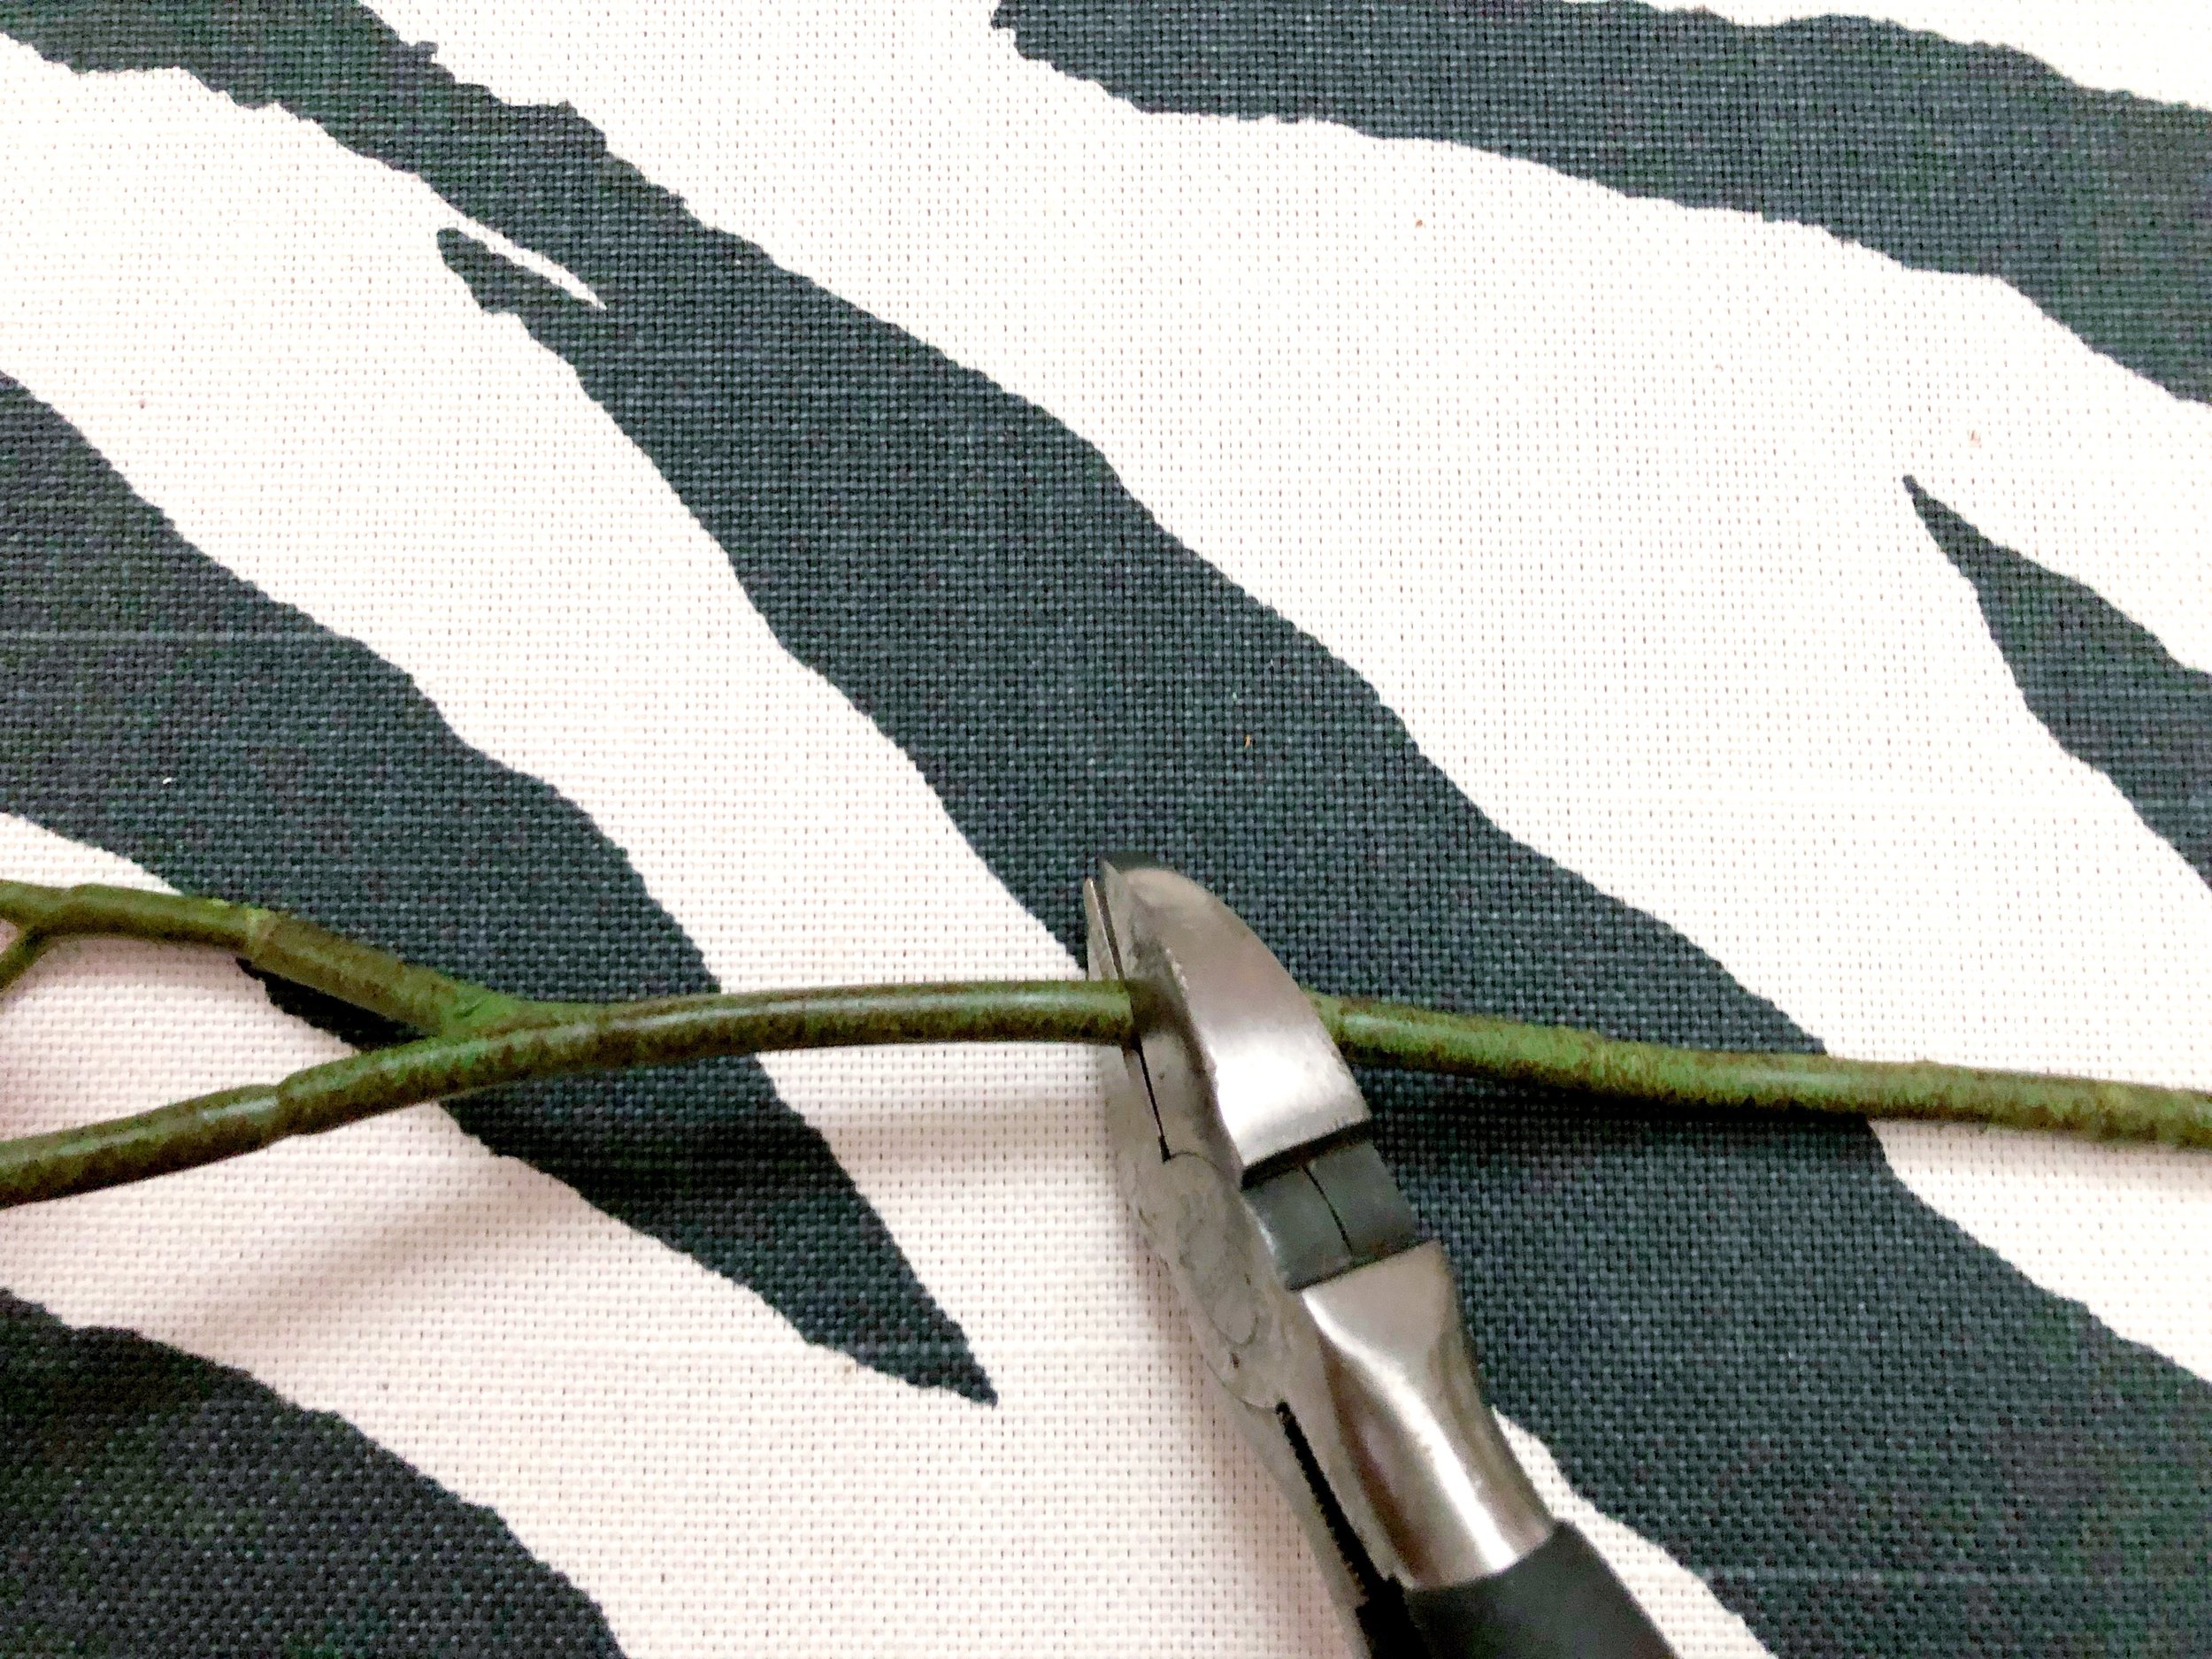
Once you’ve figured that out, go ahead and cut off any extra stem remaining.
STEP 3
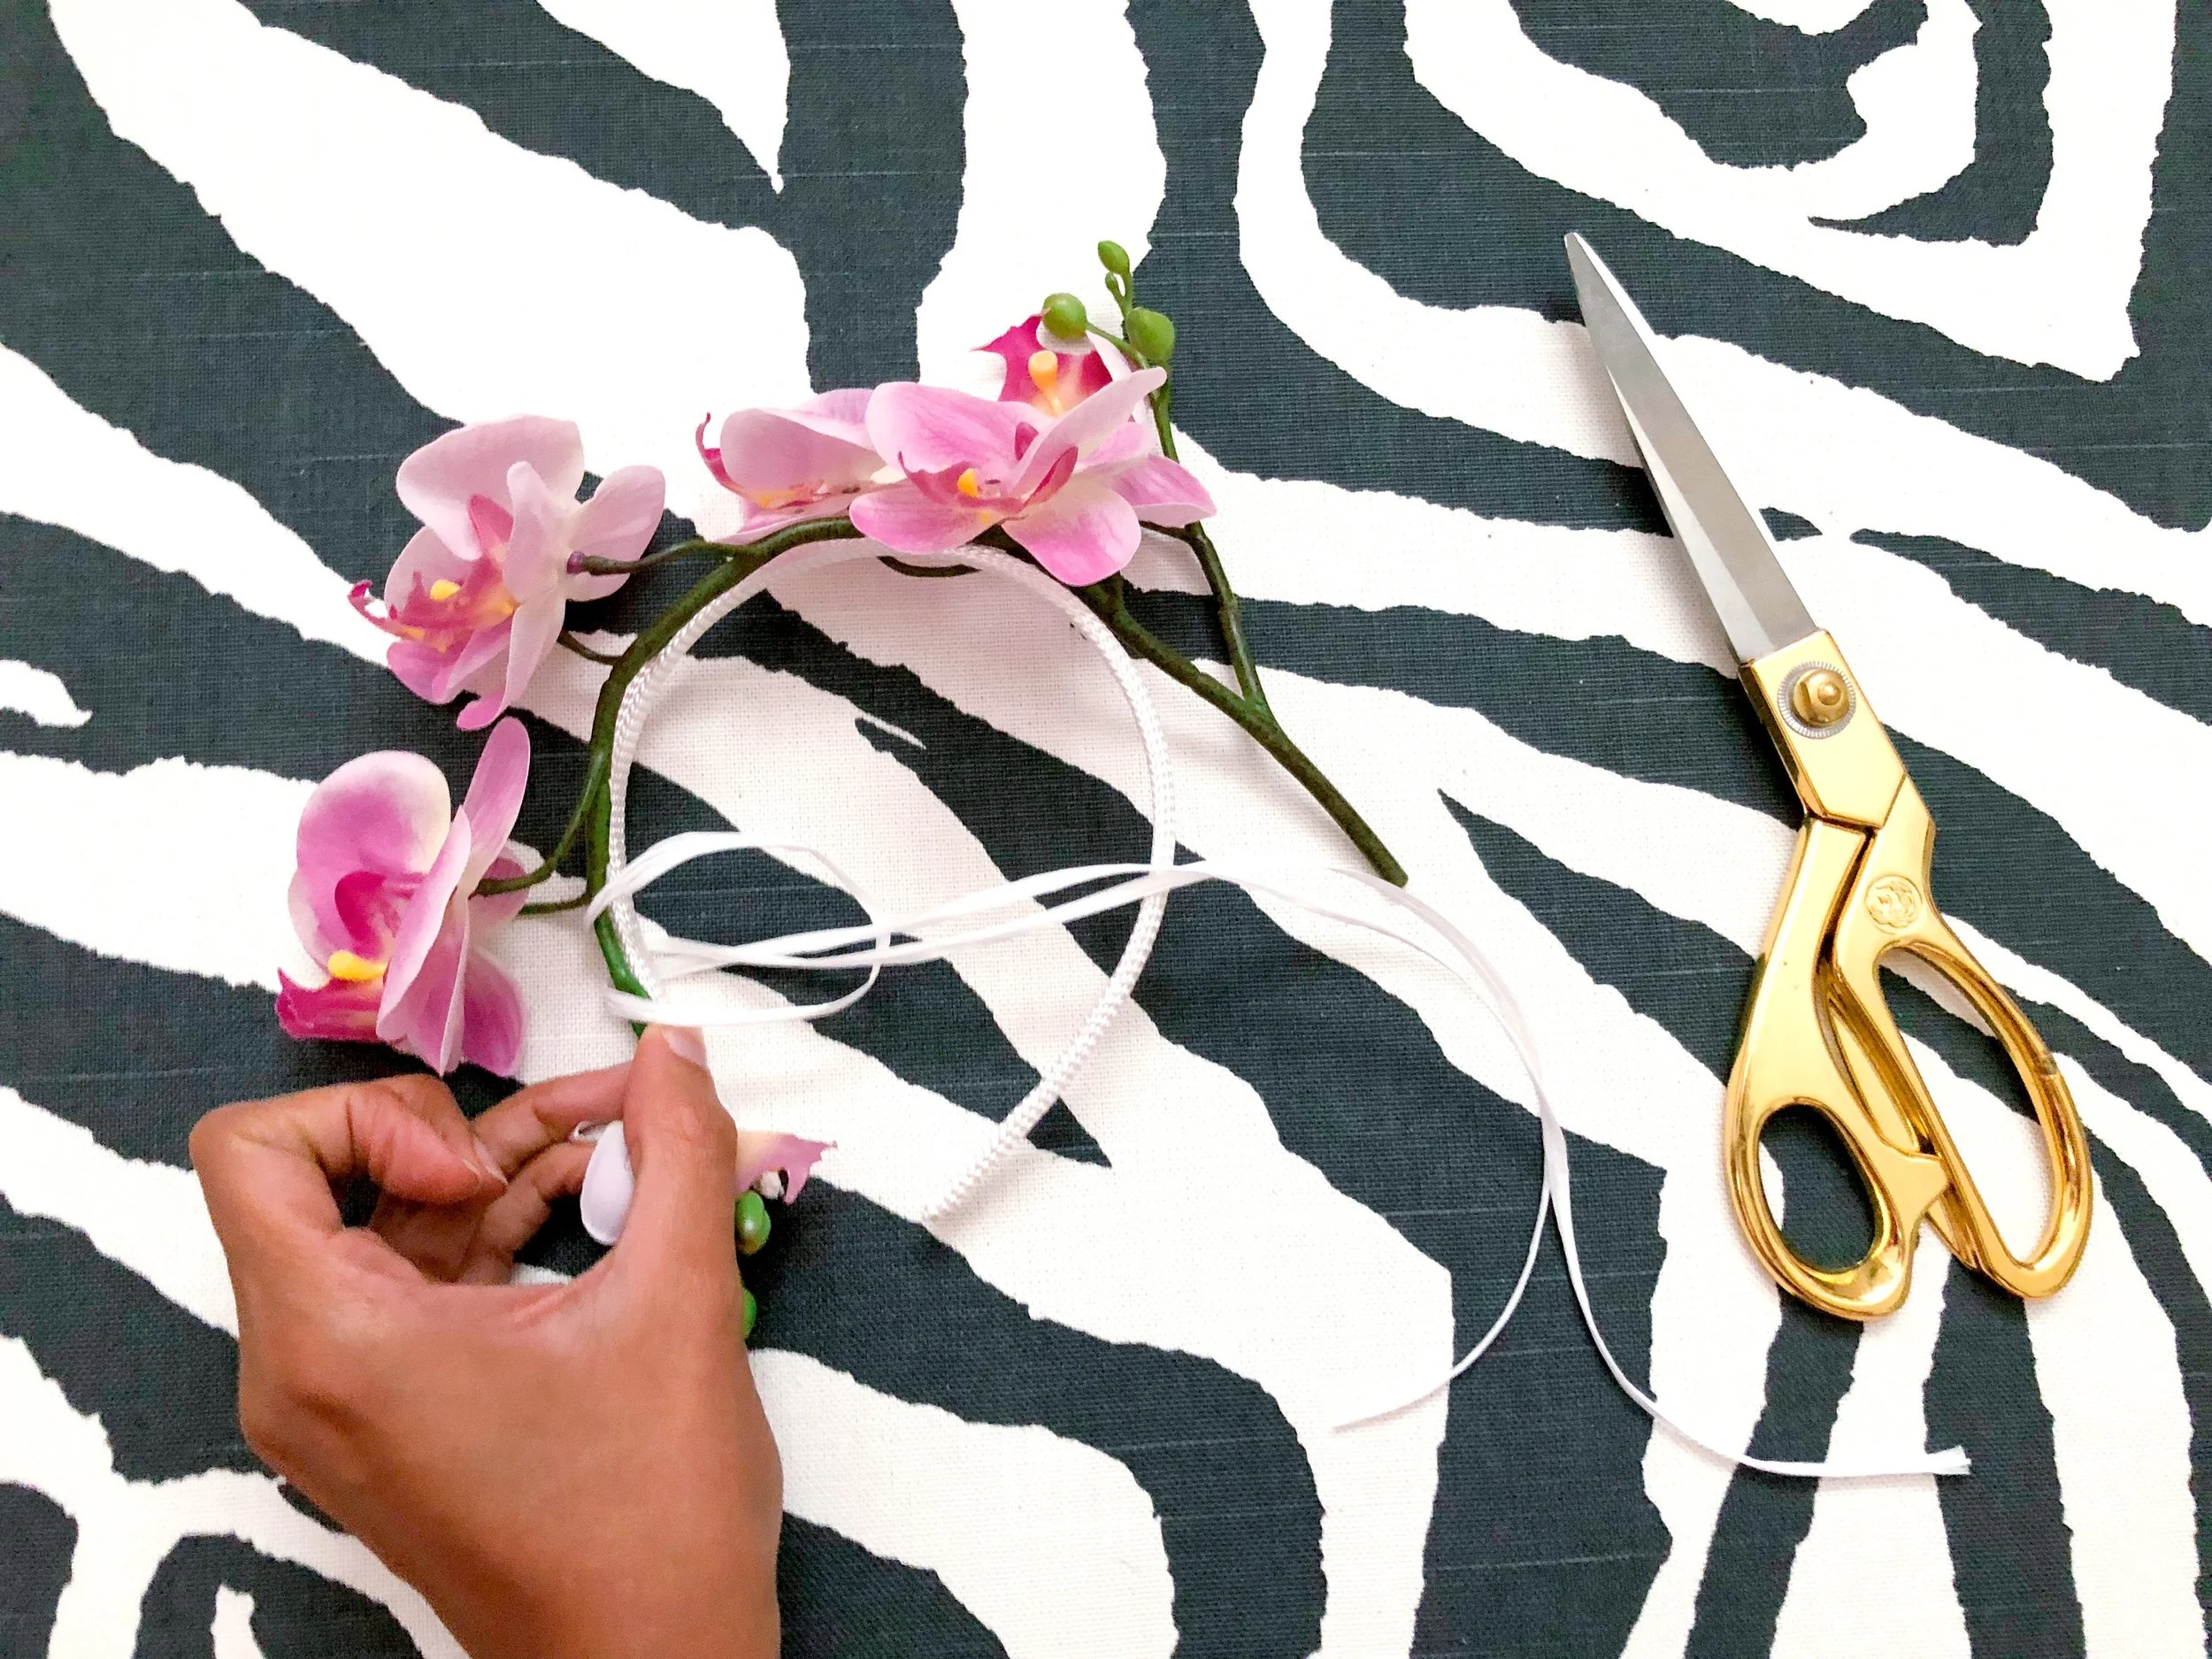
Using your raffia, form a loop around the orchid on the headband and pull the loose ends through to secure in place. Once that’s done, go back and forth wrapping and knotting the raffia to secure that area of the stem in place.
STEP 4

Trim any excess bits of raffia string remaining and secure the tiny knots with clear nail polish (not pictured in supplies). This will ensure your raffia doesn’t come undone.
STEP 5

Using your glue gun, secure areas in between with glue, pressing and holding while the glue dries. After everything is dry, you’ll be set to wear your crown! 👸🏽


p.s. Here’s a photo of me wearing the red one as part of my my custom headpiece to the On The Run II concert.