DIY TROPICAL NECKLACE HOLDER

Happy Tuesday darlings! Today’s post should have gone up a while ago but I postponed it because I wanted to re-shoot the images. While preparing for my AphroChic x HGTV house tour last Fall, I tackled quite a few of my outstanding DIY projects and this tropical necklace holder was one of them.
I was pressed for time and quickly shot the images during the process but thought they looked kind of “meh” and didn't make the post. Well today, I woke up and decided I’d just go ahead and share this quick and easy tutorial along with the images I had on hand. Sometimes we have to be okay with things not always being as polished as we’d like and just complete the task at hand.
This lesson can also be applied to our lives and while I don't support or encourage mediocrity, I think sometimes we just have to be okay with completing things. Who would have thought this DIY would hold jewelry and a life lesson. Ha!
Anywhoo, I have another one of these holders to complete but didn’t want to keep you waiting, So here goes!
SUPPLIES

- STAPLE GUN & STAPLES
- SCISSORS
- FABRIC OF YOUR LIKING
- CORK BOARD
STEP 1
Measure your cork board and trim your fabric to that size, adding an extra inch on each side of the square/rectangle.
Fold 1/2 of that extra inch inwards, then fold over the second 1/2 inch after that. This will create neat edges on the fabric as pictured. You can even steam press the fabric at this point to keep everything in place.
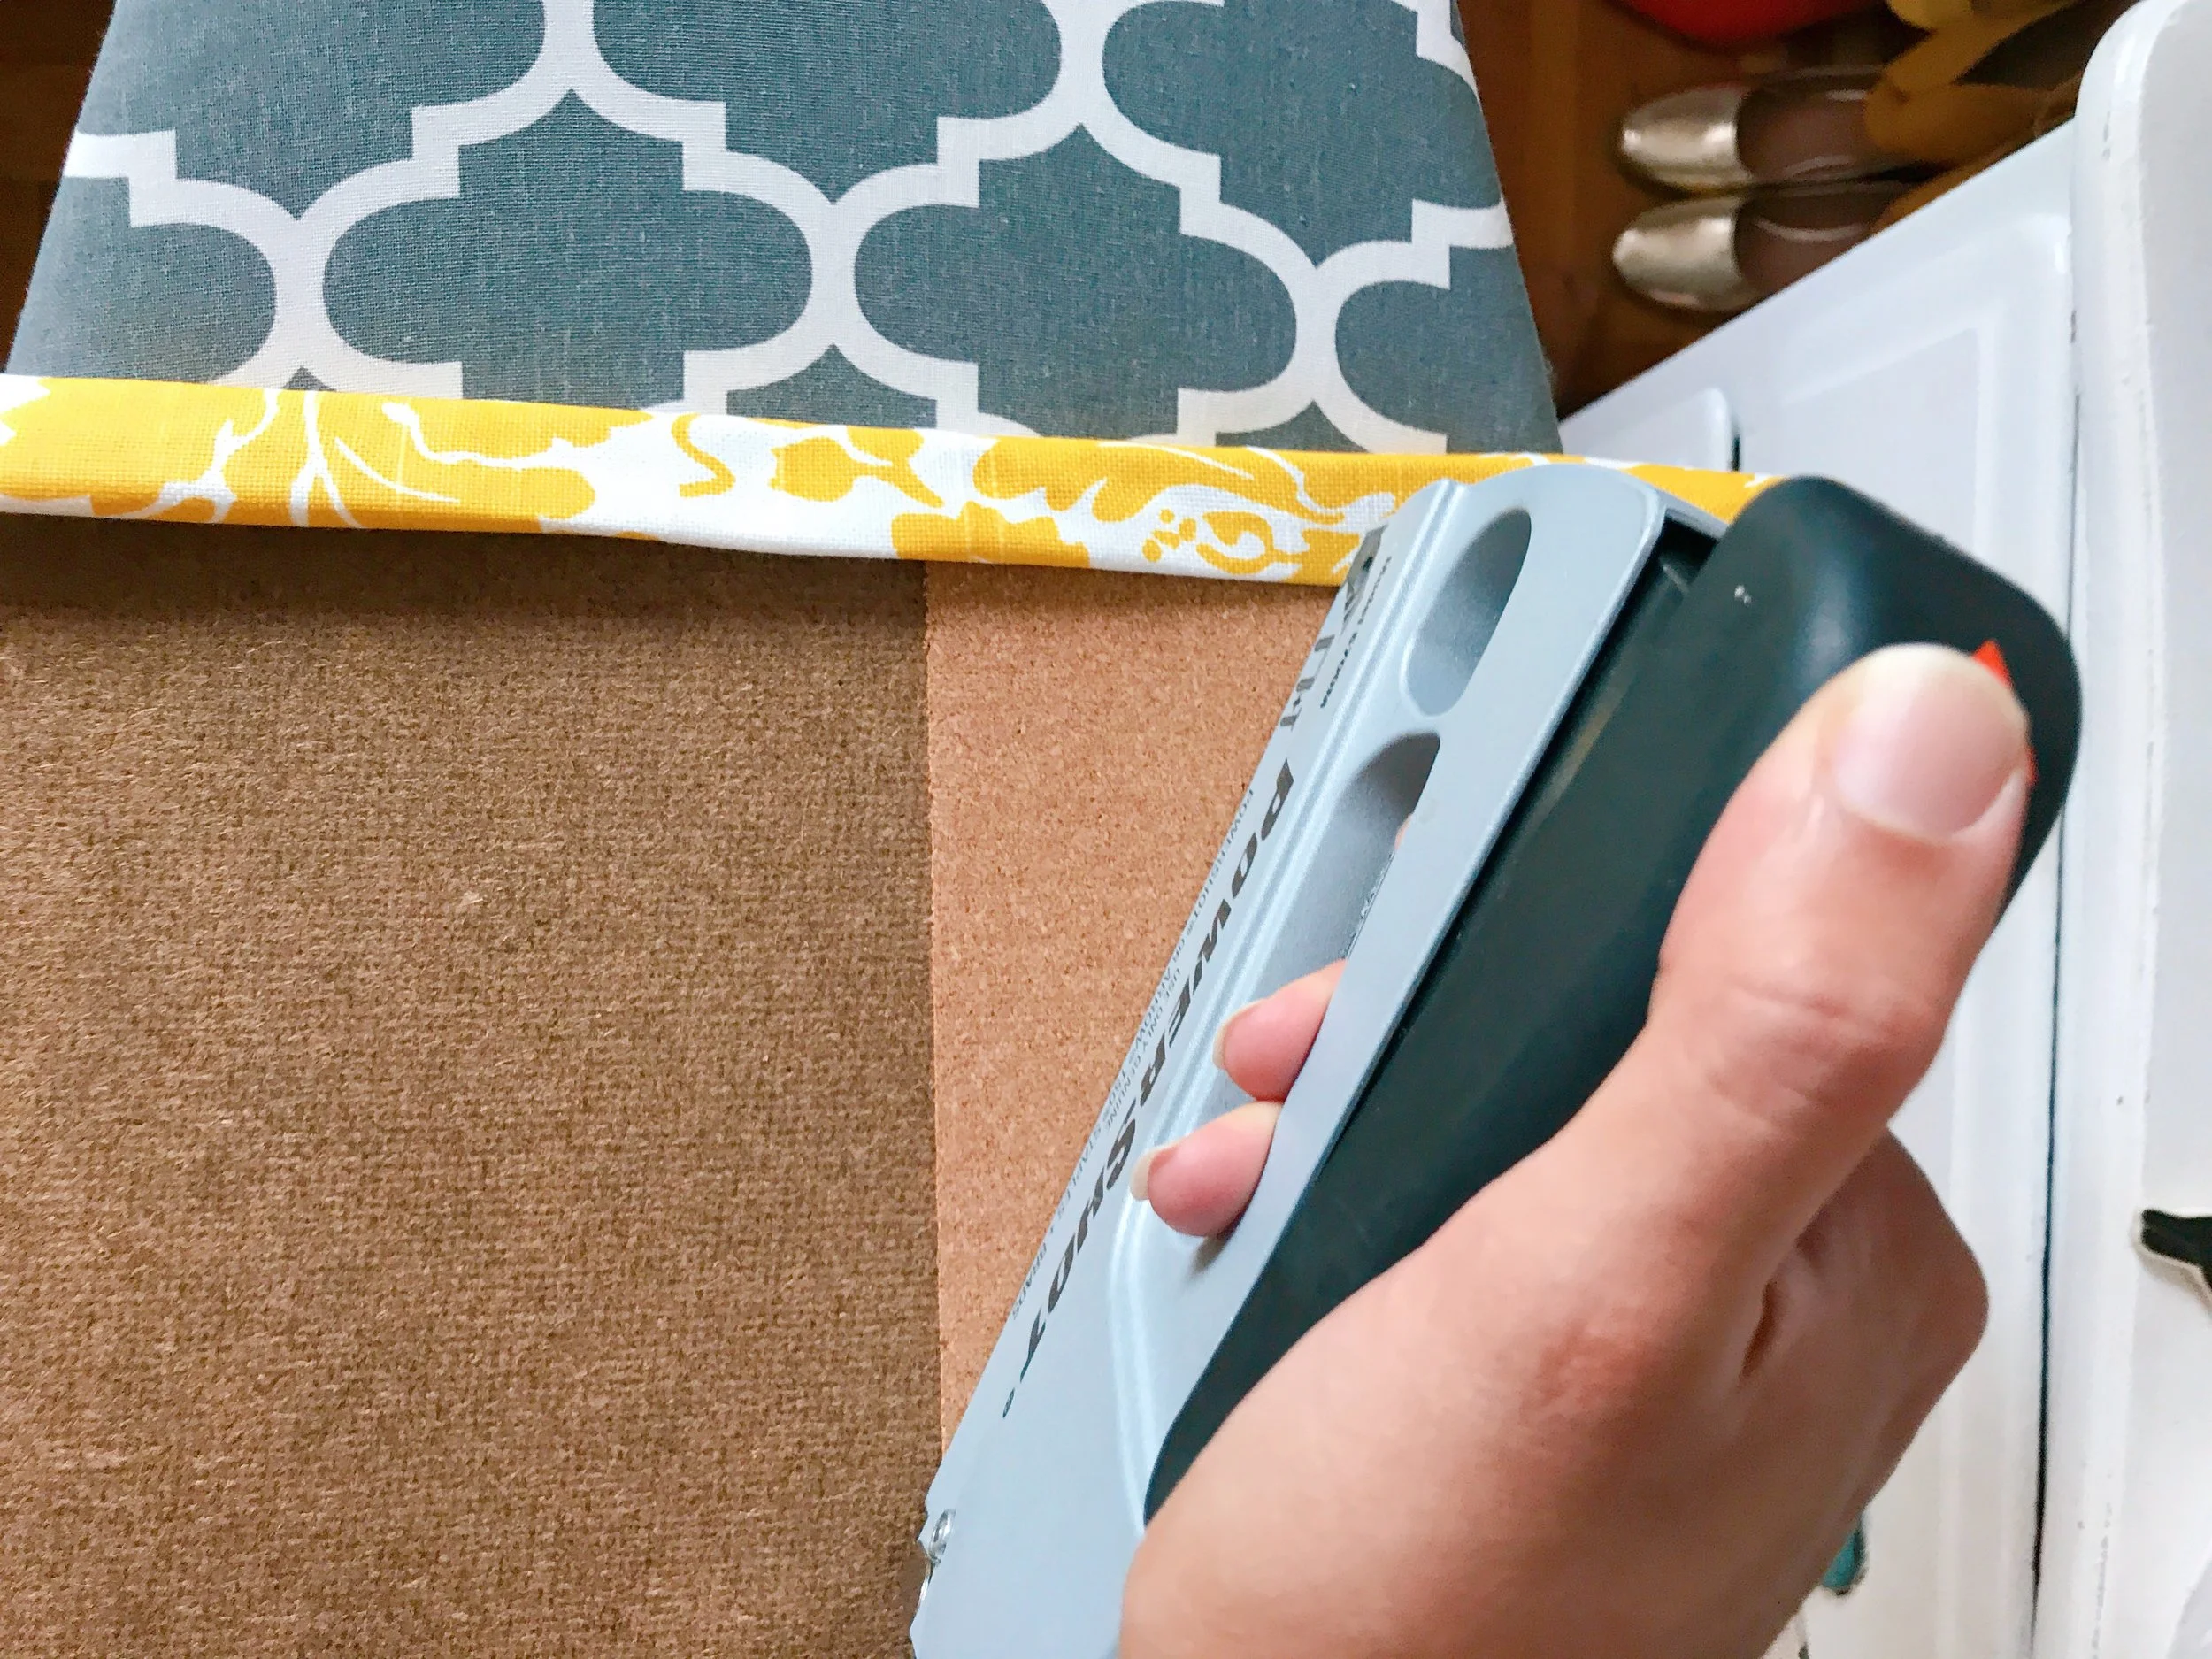
Once complete, place the board on top of your fabric and fold over the edges as if wrapping a present. Secure the fabric to the backside of the cork board with your staple gun.
STEP 2

Finish stapling around the perimeter of the board until everything looks neat and tidy like this image.
STEP 3
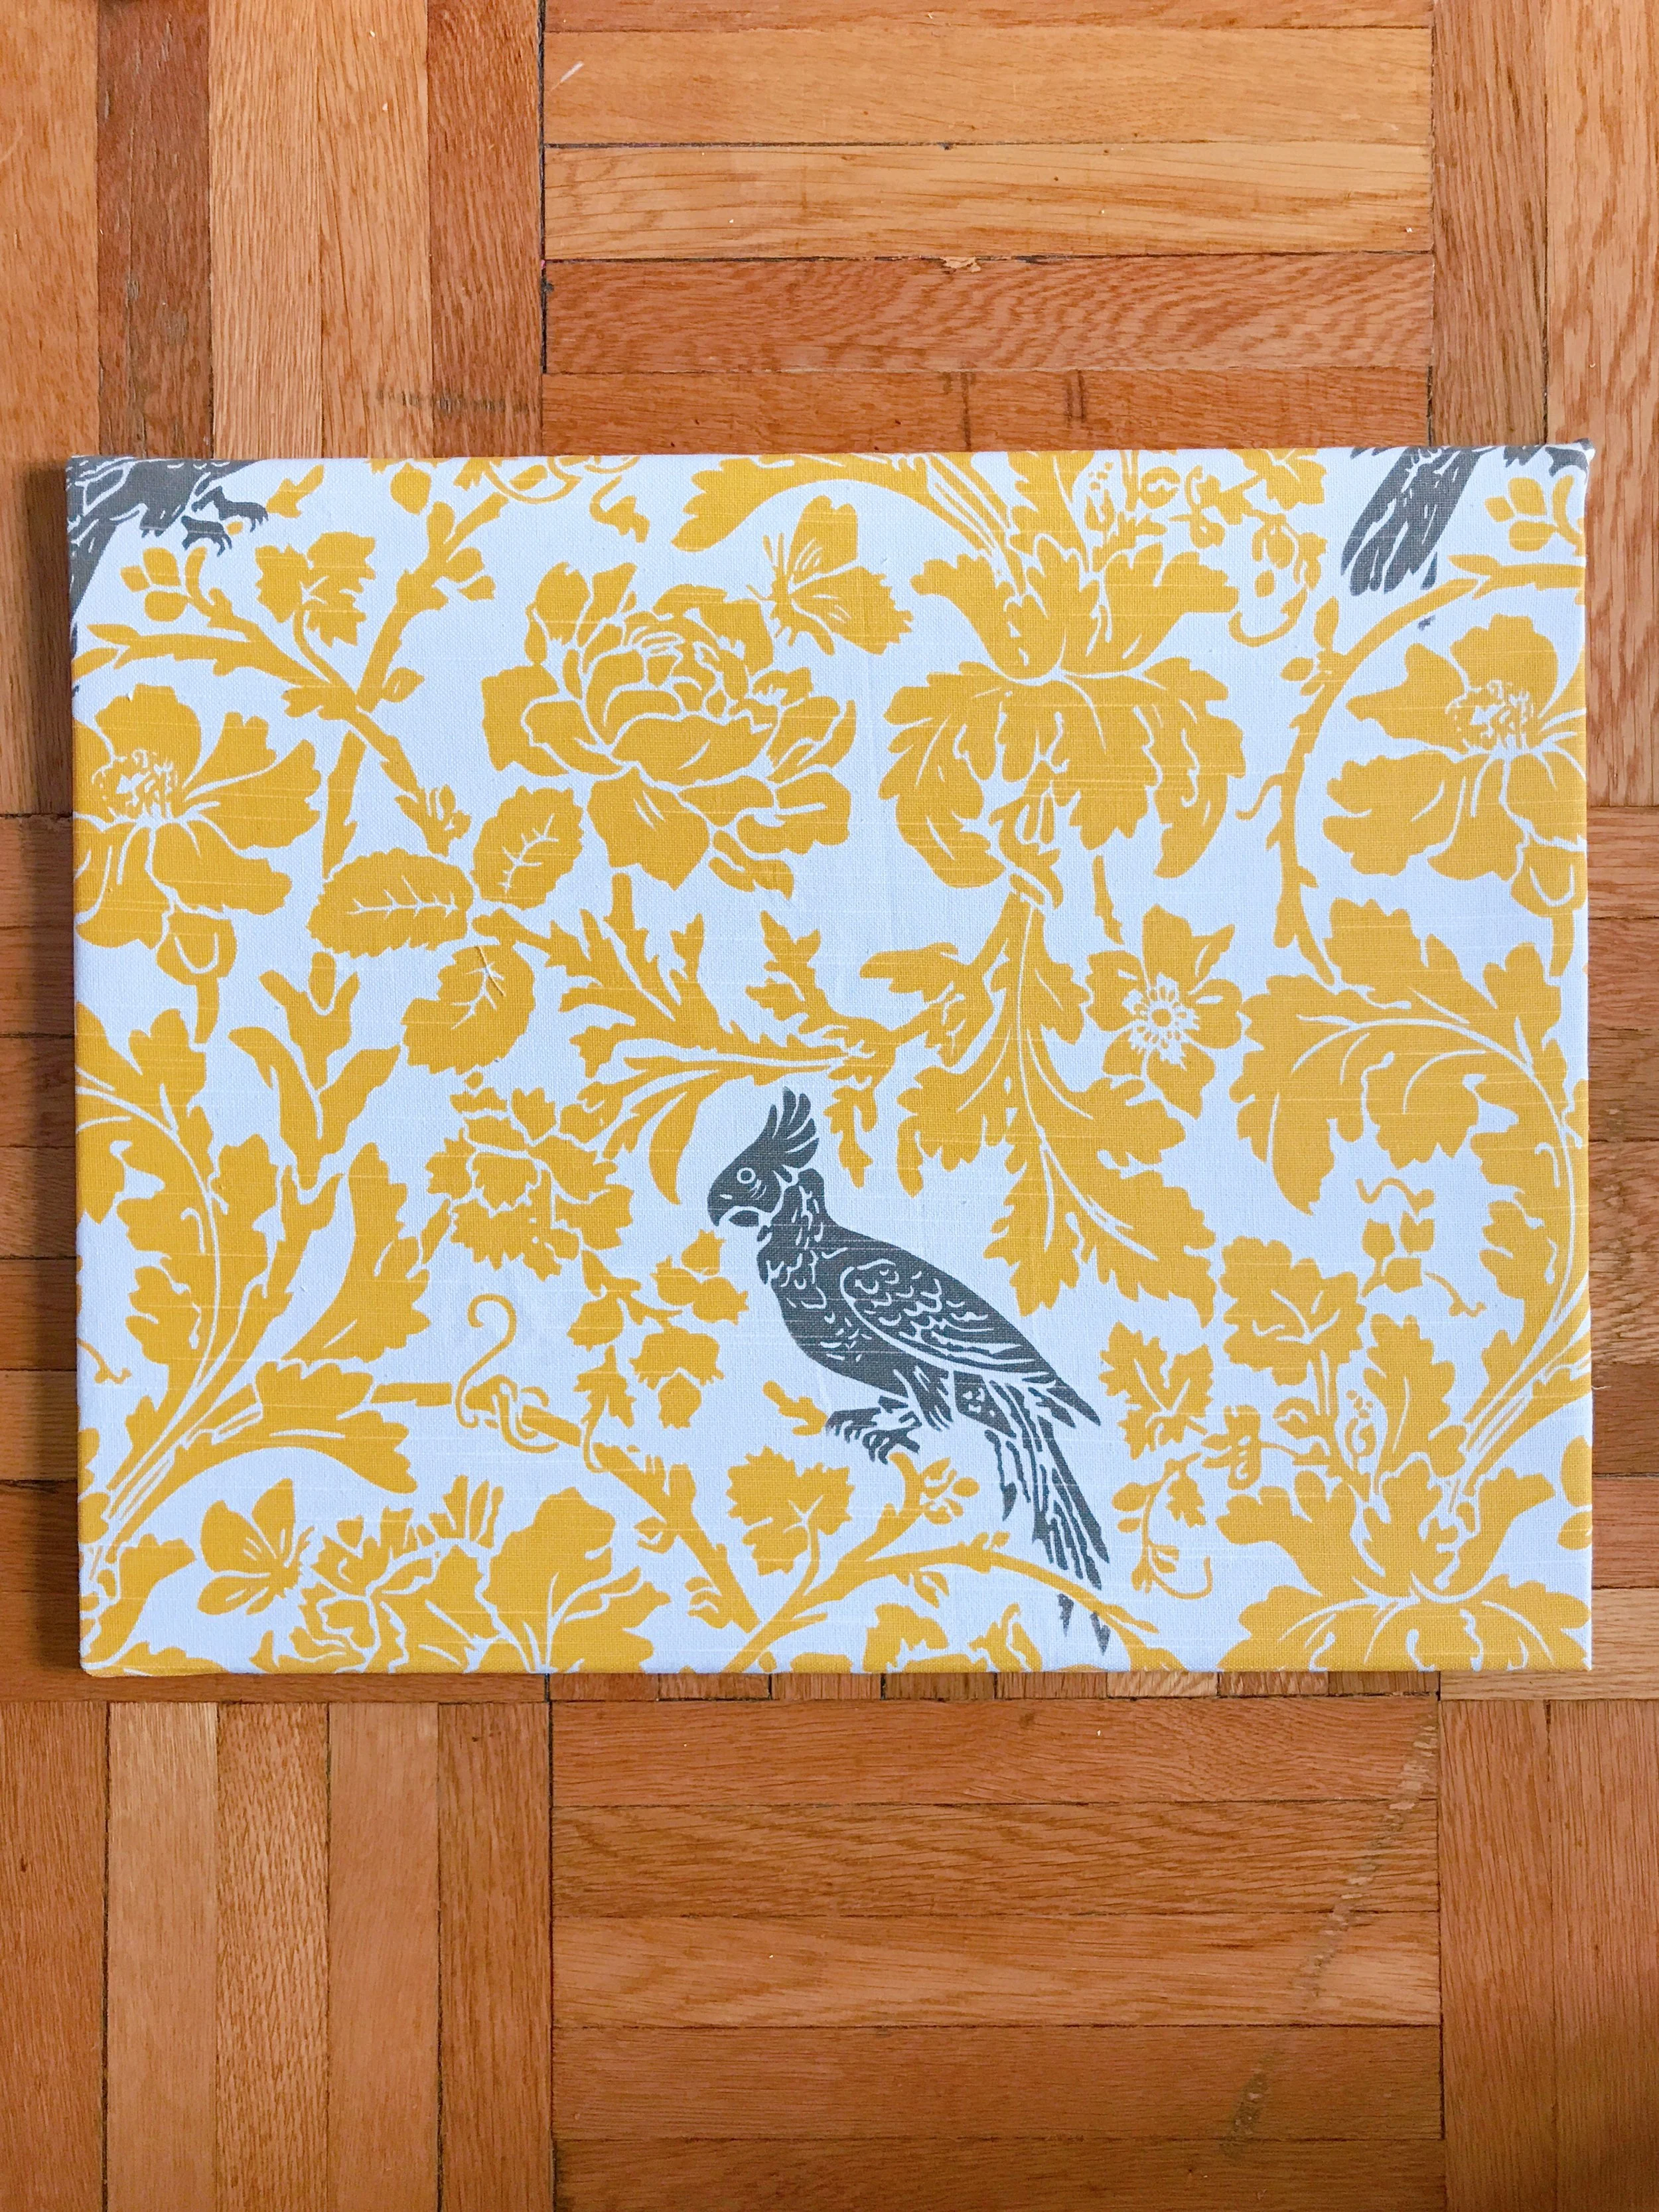
Voila! Your board is complete and ready to secure to the wall.
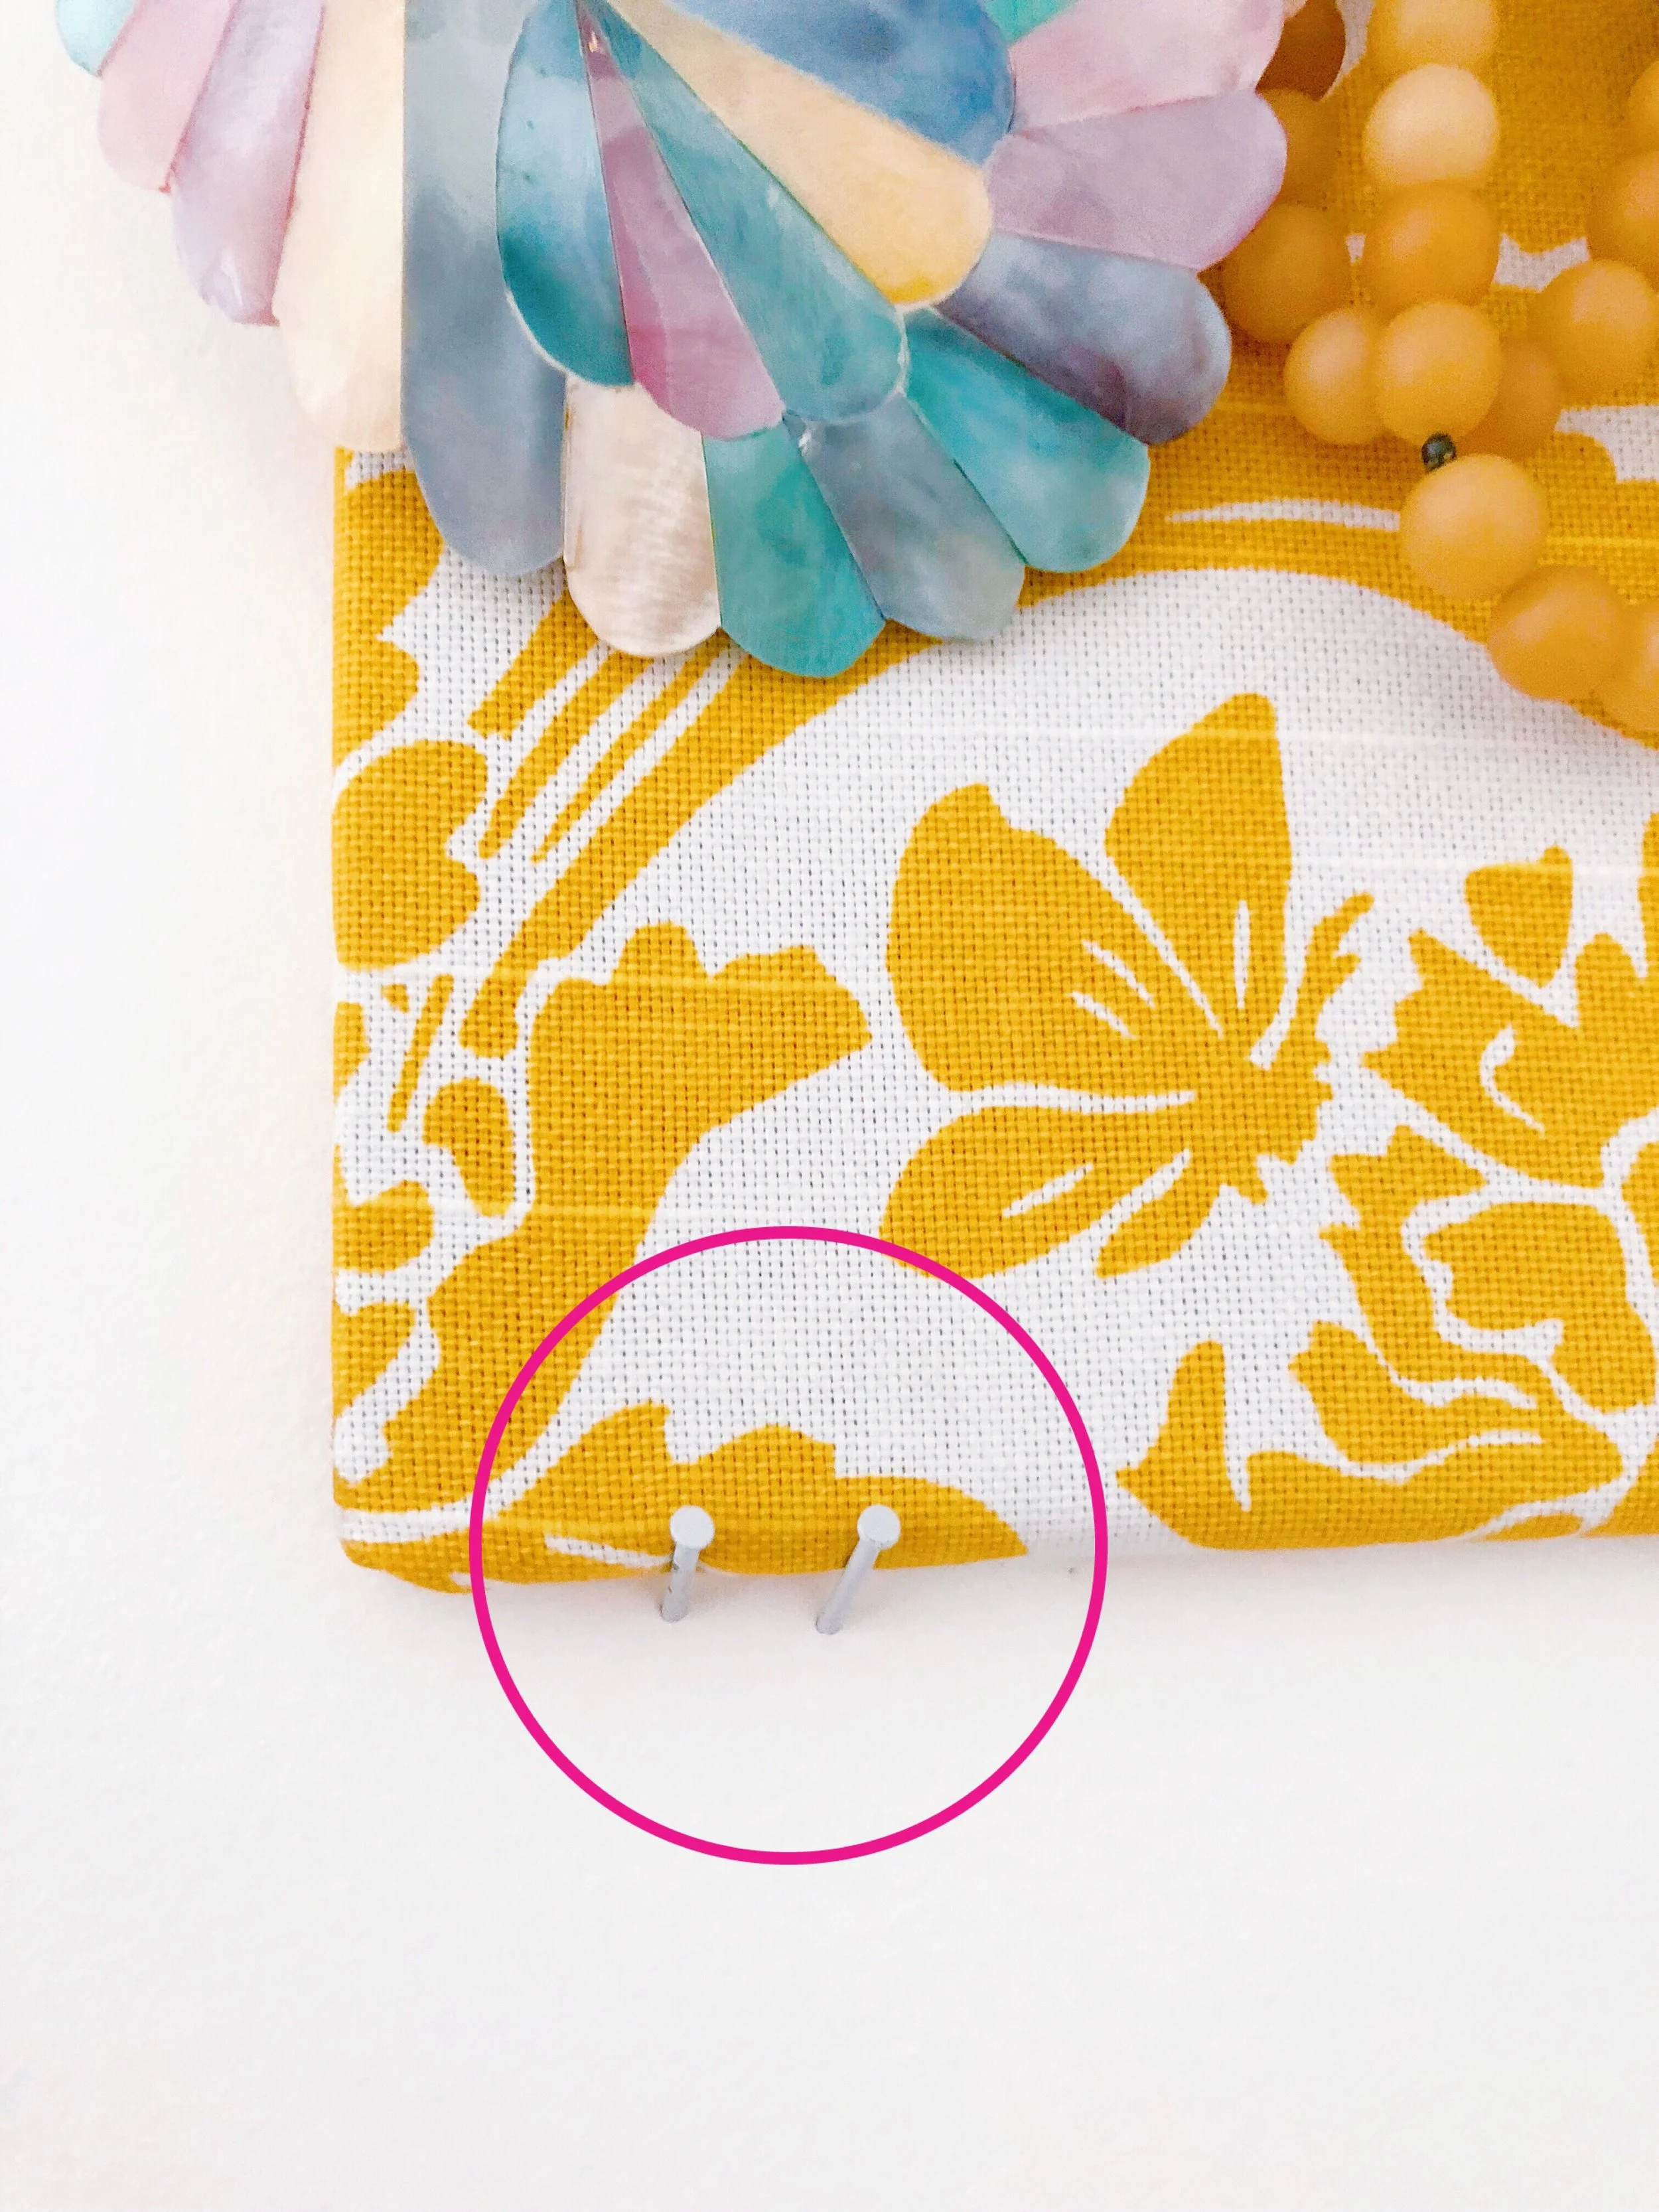
I used the sticky pads that came with my cork board kit but also added a couple nails to support the weight of the boards with necklaces. This step was crucial for me because my board came crashing down when I didn’t use the nails!

STEP 4
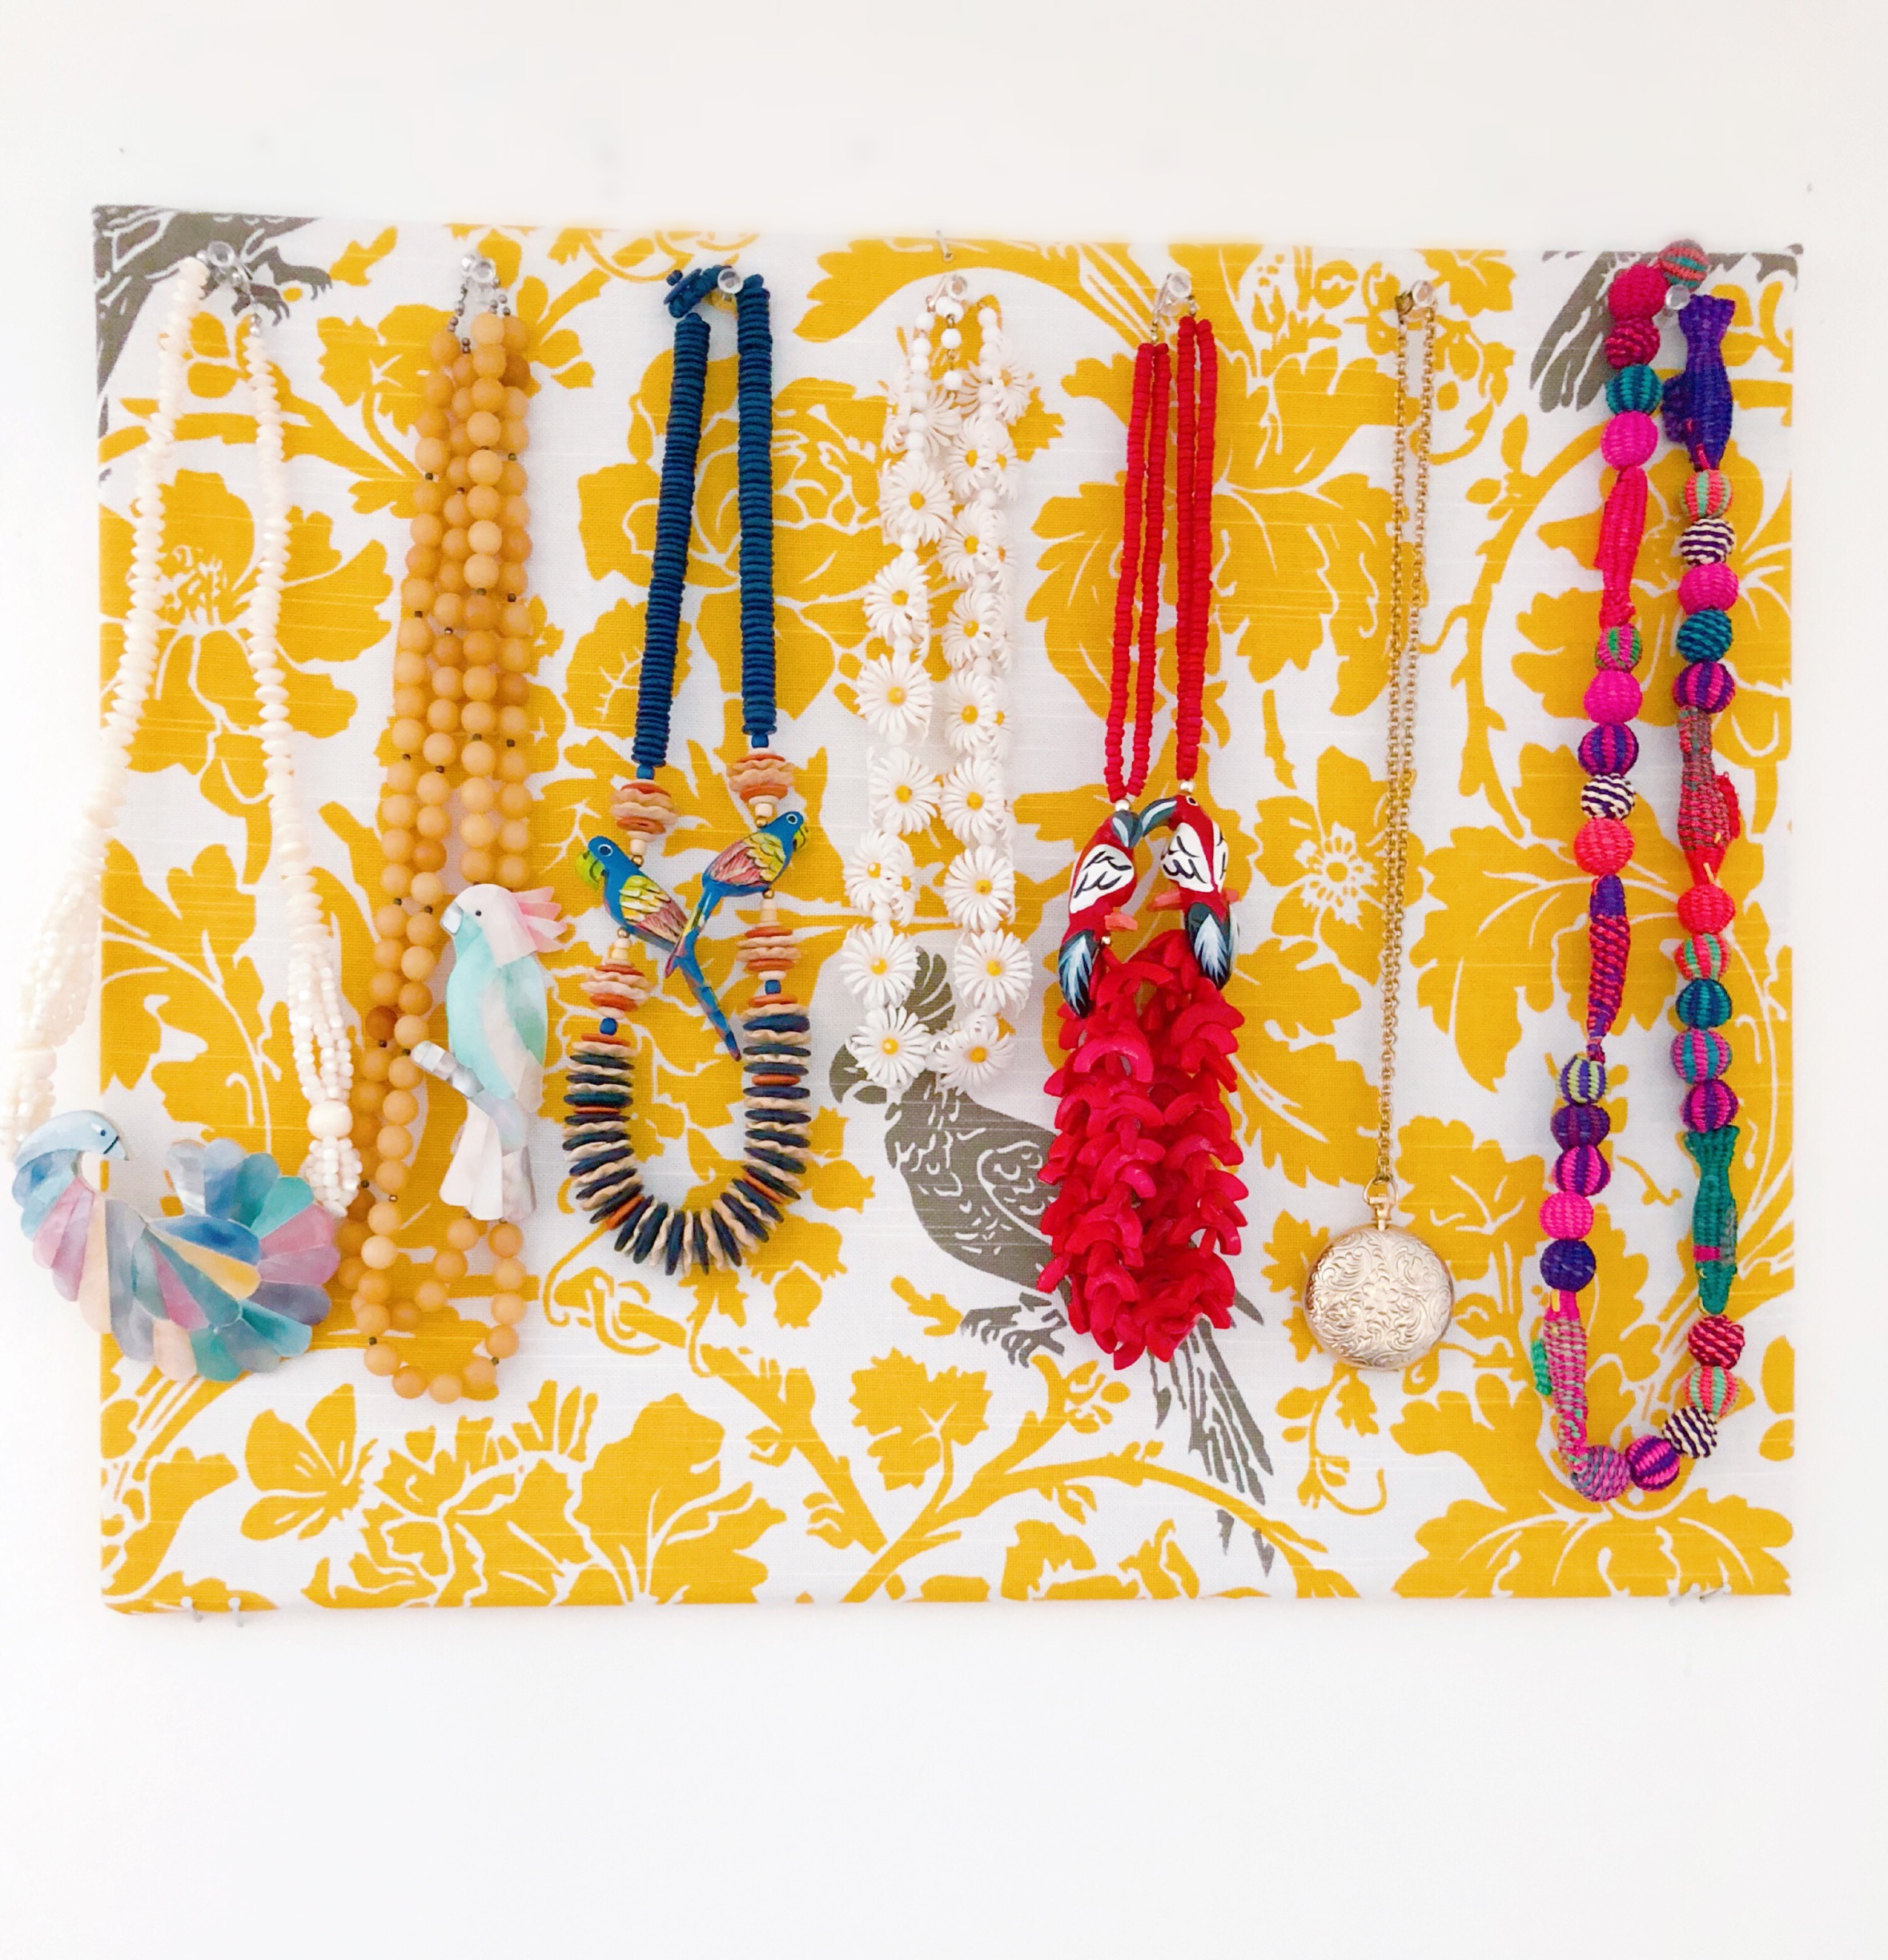
To organize/display your necklaces you’ll need to secure clear push-pins into board and then hang your favorite pieces. I chose to display a few of my vintage statement pieces. All done now!
If you tackle this project, please let me know and be sure to tag and share on social media. I'd love to see your version.